Pages

.

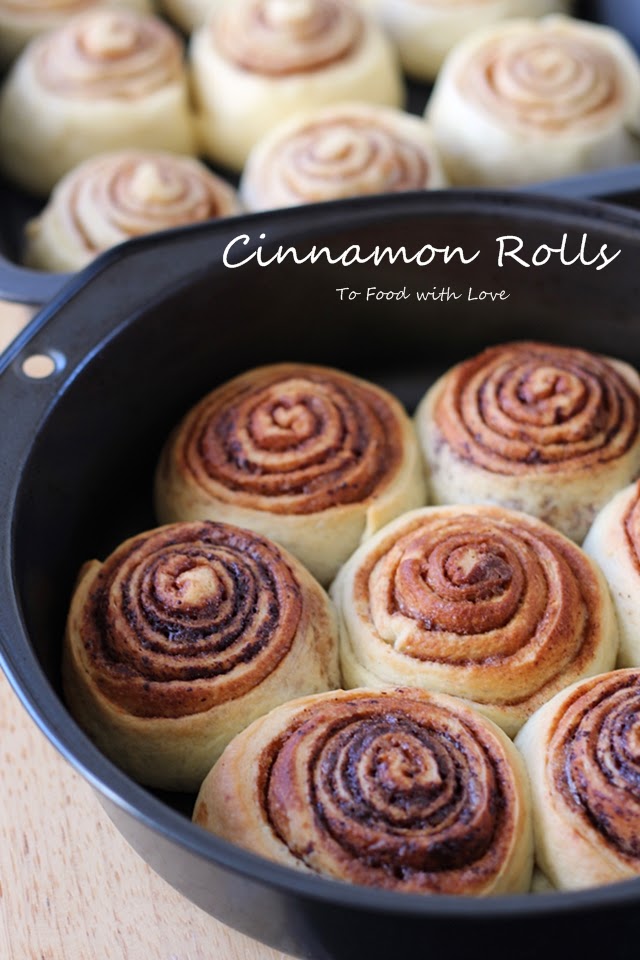
Cinnamon Rolls with Cream Cheese Frosting


Breads are actually pretty easy to make. You mostly let the machine do the kneading, then leave the dough to rise while you go about doing your chores, updating your Facebook status and checking out what's happening on Twitter, enjoy a cuppa etc. Then, it's time to roll out the dough and shape them into whatever you like, which doesn't really matter because after you let them rise again, they somehow bounce back into shape. I hardly make breads because I'd have to make a big batch, and they are best eaten on the same day.
 
These cinnamon rolls however, can be kept overnight refrigerated, about two days. All it takes is a few seconds in the microwave, and you've got fresh, soft and tasty cinnamon rolls all over again. I was never a big fan of cinnamon rolls as I find them a little too sweet and sticky for my liking. These, on the other hand, are not sticky nor overly sweet. It's the combination of that cream cheese frosting and the almost-savoury cinnamon filling that make this so addictive, and yet not too rich that you'd stop at one.


The kids came back from school one day saying that they had super-awesome cinnamon rolls in school, and that gave me the perfect excuse to make these. As they preferred their rolls plain, I skipped the frosting on half the batch. I must say, I was pleased with how they turned out. If you leave the frosting to set on the rolls for a few minutes, it leaves a thin crunchy layer on top, like Krispy Kreme frosting. The rolls rose beautifully despite the fact that it was a cold winter's day, and it helped to place the dough under the cooker hood lights for some heat.

The kids enjoyed the rolls although they still preferred the one from school, because those were sweet and sticky! Looks like I'll be making more cinnamon rolls this weekend, and I have just the perfect recipe in mind!


Cinnamon Rolls with Cream Cheese Frosting

Ingredients

3/4 cup milk, warm (slightly above body temperature)
2 tbsp sugar
2 tsp dry yeast
1 egg, lightly beaten
1/2 tsp salt
2 1/4 cup plain flour, plus extra
1/4 cup potato flour
1/3 cup unsalted butter, softened

Filling:
1/2 cup brown sugar, firmly packed
1 tbsp ground cinnamon
1 tbsp plain flour
1/4 cup butter, softened

Frosting:
3 tbsp cream cheese
3 tbsp butter, softened
2/3 cup icing sugar
1 tsp milk (approx.)
1/2 tsp vanilla extract
1/8 tsp salt

Method

Measure out the milk in a measuring cup and heat up in the microwave for 30 seconds until warm. Mix through 2 tbsp sugar and the yeast. Set aside for 15 minutes until it turns frothy and nearly doubled in height.

In the bowl of an electric mixer, pour in the yeast mixture followed by the egg, salt, plain and potato flours. Attach a dough hook and mix on low speed for 2 minutes until it's mixed through and almost coming together. Add the softened butter and mix on medium speed for about 10 minutes until the dough is elastic and smooth. Add a few extra tablespoons of plain flour during kneading if the dough looks sticky.

Turn out the dough into a large lightly greased bowl. Cover with a cloth or clingwrap and set aside in a warm place (like underneath the warm lights of your cooker hood). Let it rise for about 1-2 hours until doubled in size.

Meanwhile, mix the brown sugar, cinnamon and plain flour for the filling.

Lightly grease a large baking pan (or two small ones).

When the dough is ready, punch it down. Roll it out onto a lightly floured surface until about 1/4 inch thick, large rectangle. The short side of the rectangle should be parallel to you.

Use your fingers to spread the softened butter all over the dough, to within 1/2 inch of the border. Sprinkle and spread the filling mixture all over the butter. Then starting from the long side furthest from you, roll it up tightly and seal the edge with a little water.

Use a serrated knife to cut into 16 slices (about 1 inch thick). Arrange in the baking pans, spacing them out about 3/4 inch apart. Cover with clingwrap and set aside for an hour or so until it has doubled in size. Remove clingwrap.

Preheat oven to 180C (350F). Bake the rolls in the oven for 25 minutes or until lightly browned.

Meanwhile, beat the frosting ingredients together, adding the milk last to thin it slightly to a spreadable consistency.

Remove rolls from the oven, and spread some of the frosting over each one. Let it sit for 5 minutes, then drizzle more frosting on top. Serve warm. Leftovers can be refrigerated, and heated up the next day in the microwave for 15-20 seconds.



reade more... Résuméabuiyad

Pad Thai with Prawn and Pork


It's hard to find a good pad thai in Sydney with the exception of Thai La Ong where I had the most delicious pad thai with sliced pork. I've only been there once quite a few years ago, but I vividly remember the pad thai which was moist, saucy, and bursting with flavours of tamarind and the charry smokiness from the wok. Nothing like those pale-looking, bland and boring pad thais some other restaurants serve. That was my benchmark for pad thai, and today, I've got the perfect recipe that I hope you will enjoy. The only thing was that I couldn't find thin pad thai rice sticks at the supermarket. So I had to make do with the broader version which was about 1 cm wide. When the craving hits, you just have to make do with what's available! Continue reading to find the recipe.


Pad Thai
Serves 1 | Prep time: 30 mins | Cook time: 10 mins

Ingredients

60g thin pad thai rice sticks
Vegetable oil
1/4 large red onion, sliced
1 eggs
2 tsp chopped preserved radish/turnip
5 prawns, shelled with tail on
80g pork belly, skin-off, thinly sliced and marinated with 1/2 tsp fish sauce, 1/2 tsp sugar, 1/4 tsp cornflour
1/4 cup diced firm tofu

Sauce:
1 tbsp (15g) palm sugar, chopped
1 1/2 tbsp tomato sauce
1/4 cup tamarind paste / puree
1/4 cup water
1/4 tsp salt

Handful of garlic chives, cut into 2 inch lengths
1 cup bean sprouts, rinsed and tailed

Garnish:
Garlic chives (see above)
1 tsp dried roasted red chilli powder/flakes
1 tbsp crushed roasted peanuts
Lemon/lime wedges

Method

Preparation:
  1. Marinate the pork belly slices.
  2. Soak the rice sticks in water (not hot) for 30-60 minutes until soft and pliable. Drain and set aside.
  3. Place sauce ingredients in a saucepan and bring to a simmer until sugar is dissolved. Turn off heat.
Cooking:

  1. Heat 1 tbsp oil in a large wok. Add 2 tbsp of red onions and fry for 1 minute. Crack 1 egg into a bowl and lightly beat. Pour over the onions and scramble the eggs. Transfer to a plate and set aside.
  2. Add 2 tbsp oil into the work and add the remainder red onions, followed by 2 tsp preserved radish. Then add pork and prawns and fry until cooked. Add the tofu.
  3. Toss in the noodles and fry briskly on high heat. Add the eggs from Step 1. Pour the sauce around the edge of the wok and toss with the noodles for 1 minute until the sauce is almost absorbed. However, there should be some liquid left to keep the noodles moist. Toss in half of the bean sprouts and garlic chives for 20 seconds. Turn off heat and transfer noodles to a plate.
  4. Garnish with bean sprouts, chives, chilli powder/flakes, crushed peanuts and lemon wedges. Serve immediately and enjoy the best pad thai! 


reade more... Résuméabuiyad

Chicken Cacciatore with Pappardelle

 
Chicken Cacciatore is a simple and delicious Italian-style chicken stew made with tomatoes and white wine. "Cacciatore" means "hunter" in Italian, so this is also known as hunter's stew. I first made this a year ago when my friend Tracey shared her recipe with me. I think she visited some cooking school on her Italian holiday and kept raving to me about chicken cacciatore. Get hold of fresh pappardelle if you can (here, I've used cracked black pepper and basil pappardelle), but otherwise, any of your favourite pasta will work too. You can omit the red peppers if you like, but I find that it lends a lovely sweetness and flavour to the dish. This is ideal for those big family dinners, where you can cook up a big batch, let it simmer on the stove while you sit, relax and have a sip or two of wine. That's stress-free cooking for you. Read on to get the recipe.


Chicken Cacciatore
Serves 4 | Prep time: 15 mins | Cook time: 50 mins

Ingredients

1.2kg (2 lb) chicken thigh cutlets, skin on*
2 tbsp extra virgin olive oil
1 onion, diced
4 cloves garlic, minced
100g pancetta, diced
2 bay leaves
1 small red pepper, sliced (optional)
2 sprigs thyme (optional)
1 tbsp chopped fresh rosemary
1 cup dry white wine
1 can (400g / 14oz) diced tomatoes
Salt and freshly ground black pepper
2-3 tsp chilli flakes (optional)
2 tbsp butter**

600g fresh pappardelle

Method

  1. Heat olive oil in a large pan and place chicken skin-side down in the pan. Shake the pan occasionally to prevent chicken from sticking to the pan. Brown the chicken 5 minutes each side. Remove chicken from pan and transfer to a plate. Set aside.
  2. Add the onion and garlic to the remaining oil in the pan and sauté for 5 minutes until lightly browned. Add the pancetta, red pepper, bay leaves, thyme and rosemary. Saute for for 2 minutes.
  3. Pour in the wine, bring to a boil and simmer until it's reduced to half. Return the chicken to the pan and add tomatoes and chilli flakes (if desired). Season with salt and pepper. Bring to a boil, cover and simmer on medium heat for 30 minutes, turning the chicken once halfway through. Stir in the butter towards the end and simmer for 2 minutes. Before serving, remove the bay leaves and thyme stalks.
  4. Meanwhile, cook the pasta in salted boiling water till al dente. Drain and place on serving plates. Ladle the chicken and sauce over the pasta and serve immediately.

Note:
* Chicken thigh cutlet comes with one bone still attached
** I've added in butter to help thicken the sauce a little


Served with black pepper and basil pappardelle


reade more... Résuméabuiyad