Pages

.

Showing posts with label Pork. Show all posts

Simmered Pork Belly with Daikon


Most women [generally] get excited when they walk past a shoe shop or designer clothing store, especially when the word "Sale" is flashing everywhere. I don't think I fall in the "most women" category. I do believe in retail therapy as a form of stress relief or pick-me-up when things are looking down, but not when that designer jacket staring at you through the window has more zeroes than you'll ever see on your weekly paycheck. The only time my eyes light up with excitement while shopping is when I walk past the butcher (no, of course I'm not excited AT the butcher!), and then I'd stop to admire the different cuts of meats on display. That's my idea of window shopping. I enjoy browsing through the supermarket aisles or checking out the seasonal produce at the fruit and vegetable market.

I particularly find Korean (and Asian) supermarkets fascinating and I make it a point to go every weekend. From kimchee to frozen dumplings, quirky snacks to an array of teas and seaweed, there's always the temptation to fill the trolley with something new. Daikon (white radish) is commonly used in Korean cooking, and there's always a mountain of big, fat and beautiful radishes on display at the entrance of the supermarket. At three dollars a piece, I couldn't help but buy one. I was thinking of using it to make either steamed radish cake or a pork belly stew (Japanese style). I decided on the latter as the kids love this dish (and once, they even thought the radish tasted like potato), and it's easy to prepare with few ingredients. Winter is all about keeping warm and cozy with comfort food, just like this one.

Simmered Pork Belly with Daikon

Ingredients

3-4 cups water
900g (2 lb) pork belly, cut into 1.5 inch cubes
1/2 inch ginger, sliced
4 cloves garlic, peeled and lightly crushed
3 scallions (white part only)
1 tsp salt or to taste
700g (1 1/2 lb) daikon (white radish), cut into 1.5 inch cubes
5 hard-boiled eggs

Seasoning:
1/2 cup sake
4 tbsp soy sauce
2 tbsp sugar
4 tbsp mirin

Method

  1. Bring water to the boil in a medium pot. Add the pork, ginger, garlic and scallions and boil for 10 minutes. Skim off the scum that floats to the top. Lower the heat and simmer (covered) for 2 hours until tender.
  2. Remove the lid and add the sake. Bring to a boil and let the alcohol evaporate (about 5 minutes). Then stir in the soy, sugar and mirin. Place the daikon pieces over the pork and spoon some of the sauce over the daikon, turning the daikon over occasionally so that it's evenly coated with the sauce. Cover with the lid and simmer for 20 minutes. Remove the lid and bring to a boil and let the sauce reduce slightly (about 30 minutes) until it looks glossy. Taste and adjust seasoning if necessary. Skim off any excess fat or scum floating on top.
  3. Turn off the heat and add the eggs. Let eggs soak in the sauce for half hour to absorb the flavours. Reheat gently before serving with steamed white rice.

reade more... Résuméabuiyad

"Bak Chang" (Glutinous Rice Dumpling with Meat)


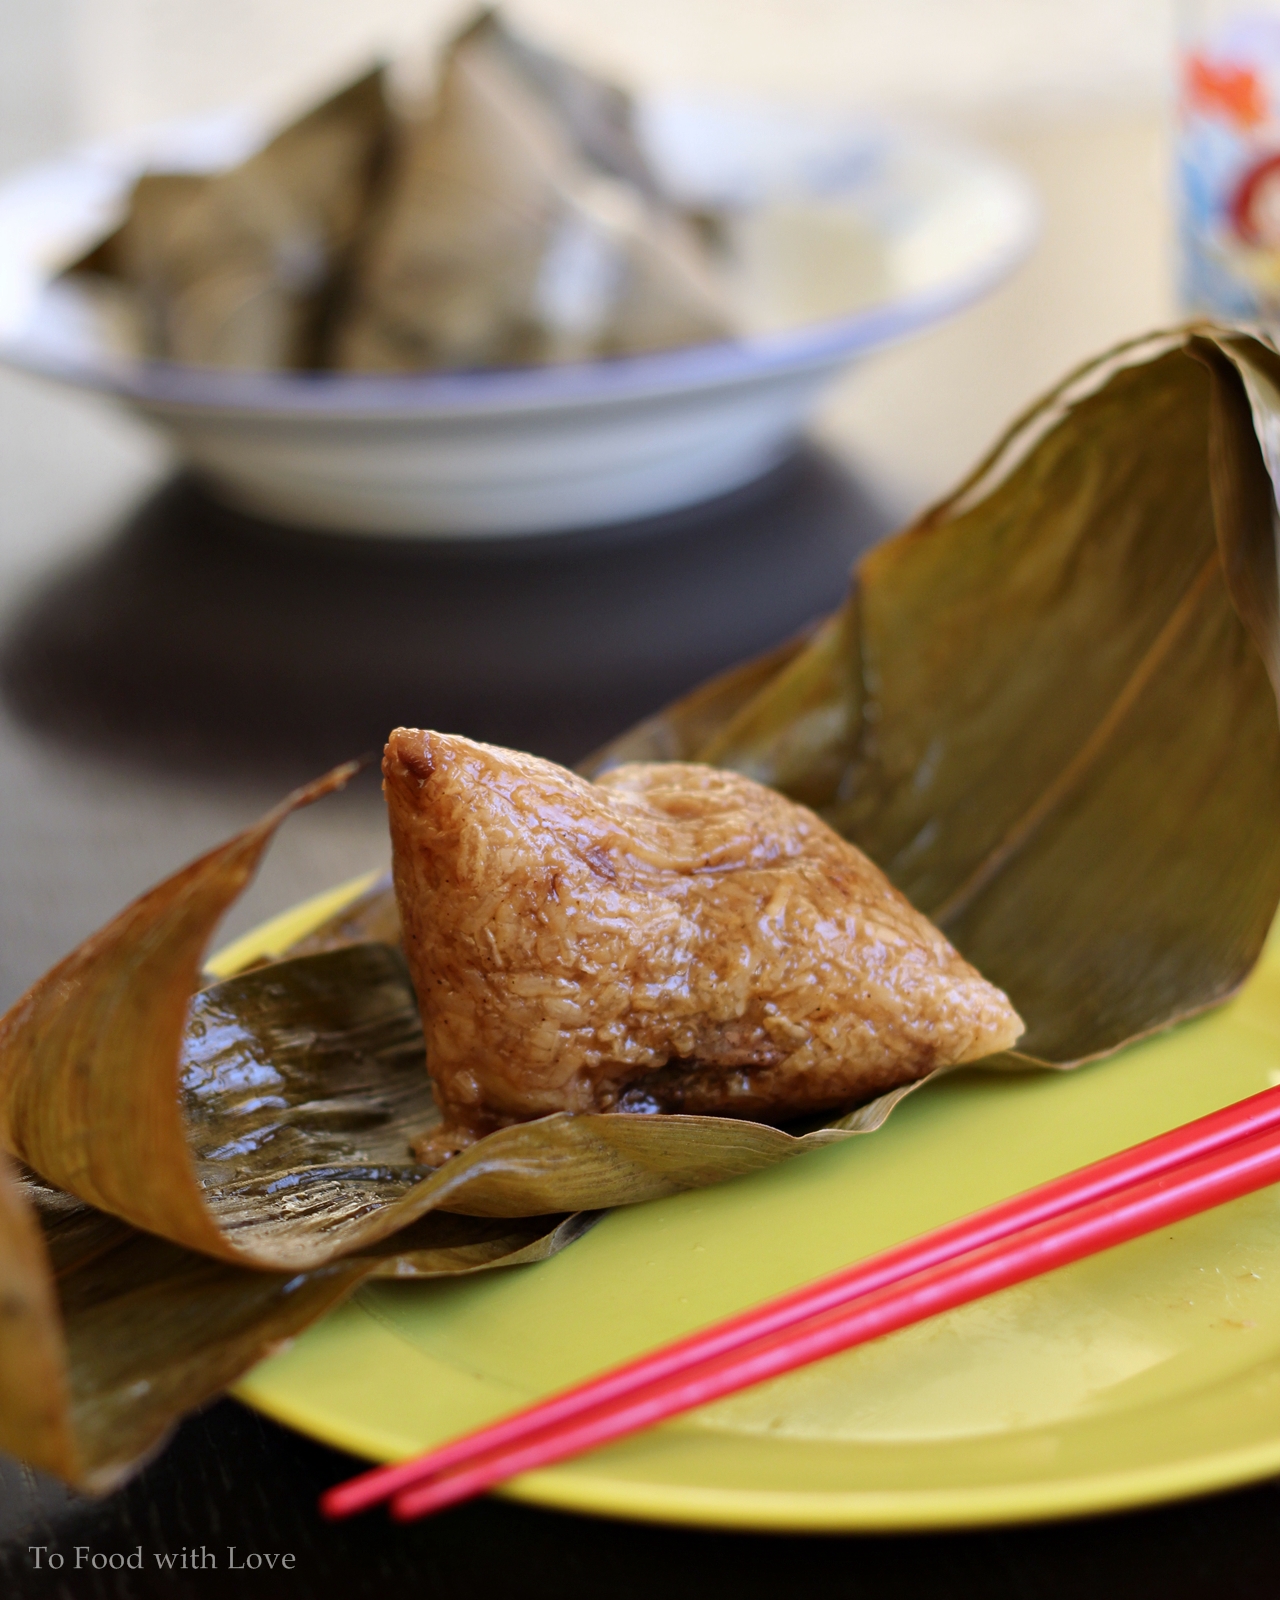
When I think of the word "multicultural", the first thing that comes to my mind is food (actually I think of food most of the time anyway, which is why I decided to have a blog to pen down all my foodie-related thoughts). In Malaysia, we are fortunate to be able to celebrate a myriad of religious and cultural festivities, and of course with every celebration, there is always food. There are two things I look forward to each year (and which I try not to miss!) which are the Mooncake festival and Dumpling festival ("Duan Wu Jie") or also known as Dragon Boat Festival. The latter was just over on 20 June, and better late then never, I decided to have a go at making these glutinous rice dumplings. Nobody makes better dumplings than my aunt (hers is simply the best!) and I haven't had them since I moved to Australia years ago. 


You can find dumplings being sold at most Asian supermarkets in Sydney, although most of them just don't make the cut. The perfect dumpling needs to have the right balance of flavour and spices and the texture of the rice is so important - not too dry, dense nor sticky. The filling (which is usually pork, dried shrimp, chestnut and mushrooms) needs to be adequately seasoned so that it complements the delicate taste of the rice. 


When I told mum that I was going to make dumplings, she thought I was nuts! Okay, not really, but she thought why bother making them as it is quite a laborious task preparing the ingredients, wrapping the dumplings and boiling them for hours. I was a little skeptical at first, and made sure I planned out my tasks properly and went over the steps in my head. I even watched Youtube tutorials on dumpling wrapping multiple times. It looked easier on video than when it came to wrapping them, but after a few, I got the hang of it. Once I mastered the art of wrapping the rice in bamboo leaves and securing them with string, the entire process wasn't as difficult as I thought, It took about two hours to prepare the ingredients and wrap the dumplings.

The hardest part was actually peeling the chestnuts! I bought fresh chestnuts with shell and all, and took advice from friends and youtube on how to crack them open and peel away the inner skin. I think I might need more practice in that area, or better still, I should just buy dried shelled chestnuts next time! Right now, what I need is a back massage, and some dumplings for supper!

Bak Chang
Makes 20-24

Ingredients:

1 kg glutinous rice
50 dried bamboo leaves
Dried china grass or raffia string for tying the chang

500g pork belly, cut into 1 inch cubes

Pork marinade:
1 tbsp soy sauce
1 tbsp oyster sauce
1 tbsp five spice powder
1 tbsp chinese cooking wine
1 tbsp sesame oil
1 tbsp dark soy sauce (Cheong Chan thick caramel)
2 tsp sugar
1 1/2 tsp salt
1/2 tsp pepper

Chestnuts (12 large or 24 small ones), peeled and boiled until soft
12 large dried Chinese mushrooms, soaked in water for 30 minutes, squeezed dry and halved
1 tsp sugar
1/2 cup oil
1/2 cup dried shrimp, soaked and drained
250g shallots, finely diced
5 cloves garlic, chopped

Rice seasoning:
4 clove garlic, chopped
3 tbsp soy sauce
1-2 tbsp oyster sauce
1 tbsp dark soy sauce (Cheong Chan thick caramel)
1 tbsp sesame oil
1 tbsp five spice powder
2 tsp salt
1/2 tsp pepper

Method

Wash and soak the rice overnight (about 12 hours). Drain rice the next day.
Wash and soak the bamboo leaves overnight. Drain before use.

Season pork with the marinade overnight.

Season the mushrooms with 1 tsp sugar. 

Heat 1/2 cup oil and fry the mushrooms for 1 minute. Drain and set aside. Fry the dried shrimp for 2 minutes, then drain and set aside. With the remaining oil in the pan, fry the shallots, stirring frequently until it starts to turn lightly golden. Add more oil if there isn't enough to fry the shallots. Dish out the shallots together with the oil into a bowl. 

Heat 1 tbsp oil in the wok and fry the  5 cloves of the chopped garlic. Add the seasoned pork and one-third of the shallot/oil mixture above and stir fry for 3-5 minutes until fragrant. Transfer the pork into a bowl. There will be some extra sauce in the wok. Transfer this sauce to the drained rice which we will fry later.

Heat 2 tbsp oil in the wok and fry the 4 cloves of chopped garlic until golden. Add the rice, the reserved shallot/oil mixture and the rest of the seasoning ingredients. Mix until evenly combined. Fry for 6-8 minutes until fragrant. Dish out.

Wrapping the chang:

Take two bamboo leaves (discard those with holes) with the shiny side up with the tip of the leaves facing inwards. Snip off the hard stems at the base of the leaves so that it's easier to fold it later. Shape it into a cone and place 1-2 tbsp of rice into the cone. Add a piece of mushroom, chestnut, pork and 1 tsp of dried shrimp. Fill with more rice until it reaches the top of the cone Make sure it's nice and compact before wrapping it into a triangular prism shape. Tie with string.

Bring a large pot of water to the boil, and add 1-2 tbsp salt if desired. Place the chang into the pot and ensure it's fully submerged. Boil for 2.5 hours, topping up with boiling water if the level goes down. When cooked, remove and hang the chang to dry for about 20 minutes. Enjoy on its own or serve with chilli sauce.

Note: Leftover dumplings can be kept frozen. Thaw the dumplings in the fridge and reheat in a steamer.


reade more... Résuméabuiyad

Sticky Baby Back BBQ Ribs


Costco is one of my favourite places to shop at (well, okay, most of my favourite shopping places revolve around food and groceries). I remember watching a documentary about Costco and how they source for only popular or quality that are tried and tested by them, and they carry a limited number of brands for each product line. This makes it easier for the consumer when deciding which brand to choose (as too many brands may confuse the consumer who might end up not buying anything!).

I saw a couple of brands for BBQ sauce and decided on Sweet Baby Ray's (after all, there's only a fifty-fifty chance I bought the wrong one!) mainly because the label stated "Award-winning", dotted with four red stars (not only my kids love stars on their homework, I have an affinity for stars too when it comes to food and product reviews). The other brand had some Japanese sounding name to it which I can't remember, plus there was a mad picture of a Japanese guy on it. My, my, my.... these ribs were possibly one of the best I've had, and almost as good as Tony Roma's. I highly recommend this, especially the sauce which turns lovely and sticky after a few minutes under the grill. It's easy to prepare, and easy clean-up afterwards too!

Sticky Barbecue Ribs
Adapted from Food.com

Ingredients

1.8kg (4 lbs) American-style pork ribs (get meaty ones, not too lean or bony)
3/4 cup brown sugar
1 tbsp smoked paprika
1 tbsp garlic powder
1 tsp salt
1-2 cups Sweet Baby Ray's Barbecue sauce

Method

Preheat oven to 160C (300F).

Mix together the sugar and spices to make a dry rub. Apply rub to ribs on all sides.

Lay ribs on two layers of foil, shiny side out. Lay a layer of foil on top of ribs and roll and crimp edges tightly, edges facing up to seal.

Place on baking tray and bake for 3-4 hours or until meat is tender and starting to shrink away from the ends of the bone. Remove from oven. Heat the broiler or oven grill.

Remove ribs from the foil, and place on a clean layer of foil on a metal rack or pan, bony side up. Brush on some BBQ sauce. Grill for 3-4 minutes until sauce is cooked on and bubbly.
Turn ribs over and brush on more sauce and grill again until sauce is bubbly and caramelized (this makes it sticky and finger-licking good!). Serve immediately.


reade more... Résuméabuiyad

Pulled Pork Burger with Spicy Mayo and Korean Slaw

 
This started with a craving for a Korean-style slaw with a spicy gochujang dressing. Gochujang (as many of you might be familiar with) is a Korean red pepper paste that are sold in tubs and come in varying degrees of "heat". You can usually tell by the number of chillies on the label. I chose one with 3 chillies I think, as these things can pack quite a punch in terms of heat and intensity of flavour. So, I was wondering what would go with Korean slaw, and thought of bo ssam (Korean boiled pork belly with lettuce wraps). I found David Chang's bo ssam recipe using pork shoulder/butt and decided to turn that into a pulled pork burger with Korean slaw. And what's a burger without mayonnaise, especially a spicy gochujang mayonnaise? And to top it off (no pun intended), I baked these wonderful buttermilk buns (or brioche) which were moist, tender and didn't fall apart like most buns do when you're halfway through a burger.
 
 
Korean food doesn't just stop at Korean Fried Chicken and Korean hotpot. Give these a go at your next party. They don't require much preparation (the buns are relatively easy too) and will feed an army or two. Moreover, you can make the slaw one day ahead, which allows the cabbage to absorb the tangy, spicy and sweet flavours from the dressing. Oh, and that slow-roasted pork? Amazing.


Pulled Pork Recipe
Serves 12-16 | Prep 20mins | Cook 6 hours | Prep one day ahead
 
2kg (4-5 pounds) bone-in pork shoulder or pork butt, skin-on
1/2 cup caster sugar (granulated sugar)
1/4 cup plus 1 teaspoon coarse salt
1/4 cup light-brown sugar
 
Using a sharp knife, score the pork skin at 1cm intervals. Place pork in a large bowl or roasting pan. In a medium bowl, mix together granulated sugar and 1/4 cup salt. Rub sugar mixture all over pork and cover bowl with plastic wrap; transfer to refrigerator for at least 6 hours and up to overnight.
 
Preheat oven to 160C (300F).
 
Transfer pork to a large roasting pan, skin-side up, discarding any accumulated juices (or drain accumulated juices from roasting pan that pork is in). Brush off any remaining salt/sugar from the skin and pat dry with a paper towel. Transfer roasting pan to oven and cook, basting the meat every hour with rendered fat in roasting pan. After 2 hours, carefully remove crackling from the pork and place on a baking tray. Continue roasting the pork and crackling for another 3-4 hours until meat is tender and easily shredded with a fork.
 
Meanwhile, in a small bowl, mix together remaining 1 teaspoon of salt and brown sugar. Rub mixture all over pork.
 
Increase oven temperature to 250C (500F). Return pork to oven until sugar has melted into a crisp crust, 10 to 15 minutes. Remove and cover pan with a foil to keep warm. To serve, use two forks and pull the pork into shreds, mixing them with the rendered fat in the pan. Enjoy on a buttermilk (brioche) bun with Korean slaw and gochujang mayo (see below for recipe). For a "healthier" alternative, serve in a lettuce wrap using Cos/Romaine lettuce, with ginger-scallion sauce, ssamjang, kimchi and Korean slaw.
 
Korean Slaw
Serves 12-16 | Prep 20 mins | Make one day ahead
 
1/4 small savoy cabbage, finely shredded
1/4 small red cabbage, finely shredded
1 large carrot, peeled and julienned
1 small red onion, sliced thinly
2-3 stalks scallions, sliced thinly
 
Slaw dressing (mixed well in a bowl):
7 tablespoons cider vinegar
3 tablespoons gochujang
4 1/2 tablespoons sesame oil
2 tablespoons brown sugar
1 1/2 tablespoons honey
1 tablespoon soy sauce
1 tablespoon finely chopped garlic
2 tablespoon toasted sesame seeds
 
I like to prepare this one day ahead and refrigerate it overnight. This allows the cabbage to absorb all those flavours from dressing. Whisk together the ingredients for the dressing. Place the cabbage, carrots, onions and scallions in a large bowl and gradually add the dressing, tossing to ensure it's evenly mixed through. Cover with clingwrap and refrigerate overnight until ready to serve.
 
Gochujang mayonnaise
 
3/4 cup gochujang (Korean red pepper paste)
1 cup + 2 tablespoons Japanese/Korean mayonnaise
2 tablespoons ketchup
 
Combine and mix well in a bowl. Set aside until ready to serve with burgers.
 
Buttermilk buns
Serves 12-16 | Prep 20 mins | Cook 30 mins
100ml milk
28g active yeast (10g. dried)
90g sugar
2 free range eggs
840g strong bread flour
70g butter, softened at room temperature
400ml buttermilk
14g Malden sea salt
80ml vegetable oil
 
Glaze:
1 egg yolk + 1/2 tbsp milk
Sesame seeds (black/white)
Sea salt
 
Prepare this while the pork is cooking in the oven. In the bowl of a stand-mixer, add salt and sugar followed by flour and yeast. Mix using a dough hook on medium speed. Combine the milk, buttermilk, eggs and oil then add to the bowl, still on medium speed. Once a dough forms, add the butter in small knobs and knead until gluten is formed (about 10 minutes). Sprinkle a bit of flour if it's still too sticky. Prove in a bowl covered by cling film or a damp cloth in a warm place. Once it doubles in size, bring back down making sure as much of the air is removed from the dough, then form round buns and prove again. When ready, glaze with egg yolk and sprinkle with sesame seeds and sea salt. Bake at 160C (300F) for 25-30 minutes until crust is richly brown and glossy. When done, remove from the oven and leave to cool before cutting.
 
Assemble the burgers!
Slice the buns in half, spread with butter and toast them buttered side down on a hot grill pan.
Spread some gochujang mayonnaise on the bottom half of the bun, followed by some pulled pork, bits of crackling. Top with a handful of Korean slaw and cover with the other half of the bun. Add more mayo if desired. Serve immediately and enjoy!
 
Nice Buns!


More spicy mayo for more oomph!


reade more... Résuméabuiyad

Lor Mee (Braised Noodles)


I cooked "Lor Mee" (Singapore-style) this weekend and updated my earlier post with new photos.

Lor mee simply refers to braised noodles, which typically uses thick yellow noodles served in a bowl with a thick flavoursome gravy (thickened with starch solution and/or egg). They are usually topped with sliced pork, deep-fried yam or other fritters, hard-boiled egg, fish cake or fresh seafood, and then served with a generous drizzle of black vinegar, chilli and minced garlic.

I still have not had Lor Mee in Sydney, though I'm sure it would be available in one of the many Malaysian/Singaporean eateries that have been popping up in many places recently. I remember many years ago, there were only a couple of such eateries in the city, but now, there are just too many to keep track of. Of course, everyone claims to serve Malaysian/Singaporean cuisine, but whether they are authentic or not is something else.


I happened to find  a packet of noodles in my fridge that was screaming out to be used before it's due date. Fortunately, I had some pork belly and prawn shells in the freezer, which meant that it was the perfect opportunity to make Lor Mee. I didn't have any beansprouts, but they are entirely optional.

This is a simple and tasty version of Lor Mee that is pretty easy to cook. Basically, you just need to prepare the stock (which I made from the pork and prawn shells, and chicken stock), then add in the noodles, thicken up the gravy with starch and egg, and it's ready to serve up! Don't forget to add the minced garlic and black vinegar before serving. It just isn't Lor Mee without them!


Lor Mee Recipe

Ingredients

500g thick yellow/hokkien noodles
2 cups bean sprouts

2 cups prawn shells/heads
1/2 onion, cut into wedges
400g pork belly
1/2 tbsp Cheong Chan thick caramel
1 tbsp sugar
4 cloves garlic, crushed
7 cups water or pork/chicken stock
1/2 tsp five-spice powder
3-4 tbsp Cheong Chan thick caramel (depending on how dark you like the gravy to be)
3-4 tbsp light soy sauce
2 tsp chicken stock powder
1 tsp salt (or more to taste)
1/2 tsp pepper
4 hard-boiled eggs

Thickening:
5-6 tbsp tapioca starch + 1/2 cup water (use more starch if you like it thicker)
1 egg, lightly beaten with 2 tbsp water

Garnish and condiments:
1 cup sliced fish cakes
Chinkiang Black Vinegar
White pepper
Chopped coriander leaves
Sliced red chillies
Sambal (garlic chilli paste) - you can try Glory Nyonya Sambal Chilli
Minced garlic (6-8 cloves, finely chopped in a blender with a little salt, sugar, hot water and white vinegar)

Method

Prepare the pork belly by boiling it in salted water for 5 minutes to remove impurities which will surface as scum. Discard the water and rinse the pork, then dry with a paper towel. Rub 1/2 tbsp Cheong Chan thick caramel over the meat. Heat up 1 tbsp oil with 1 tbsp sugar in a medium-large pot. When the sugar caramelizes to a brown colour, remove the pot from the heat. Carefully place the pork belly into the pot and quickly cover with the lid to prevent the oil from splattering. Then place it back on the heat and add the garlic cloves. Sear the meat on all sides until browned. Add 4 cups water, five-spice, thick caramel and light soy sauce and simmer for 1-2 hours until tender. Add hard-boiled eggs during the last 15 minutes of cooking.

While the pork is simmering, heat up 1 tbsp oil in a wok and fry the prawn shells until they turn red. Add the onion and 3 cups water and bring to a boil. Simmer for 30 minutes, then strain the stock.

Once the pork is tender, remove the pork and cut into thin slices, and put aside. Remove the hard-boiled eggs and cut in half. Then, add the prawn stock to the pork stock, together with the chicken stock powder, salt and pepper to taste. Simmer for 10 minutes. Then gradually stir in the tapioca starch solution and mix well until it comes to a simmer. Stir in the beaten egg mixture and mix through quickly. Turn off the heat.

When ready to serve, cook the noodles and bean sprouts (separately) in boiling water until cooked to your liking. Drain and divide into 4 serving bowls. Ladle the gravy over the noodles. Top with sliced pork, fish cake, hard-boiled egg and some minced garlic. Don't forget to add a splash of black vinegar and some white pepper, and garnish with sliced red chillies and coriander leaves. Serve hot with sambal chilli!

Note: For something a little extra, serve it with battered fish cocktails. I got them from the local fish & chip shop, and they went together perfectly!


Noodles in thickened gravy, topped with sliced fish cake, pork belly, hard-boiled egg,
sliced red chillies and minced garlic, drizzled with black vinegar
reade more... Résuméabuiyad

Pork Ribs with Black Bean and Bitter Gourd


Now that the summer holidays are over and the kids are back in school, things are getting busy again. It's not only the homework, but birthday parties, shopping for birthday presents, ironing the summer uniforms (it's much easier in winter when they just have to wear their skivvies and pullovers!), planning meals and packing lunchboxes. The only time I cook is usually on the weekends, and even then, I try to spend more time with the kids and less in the kitchen.

Like most braises and stews, this dish of black bean pork ribs with bitter gourd is a relatively easy dish to prepare - a one pot wonder with meat and veggies included. The bitterness of the gourd complements the rest of the dish really well - the tender pork and that delicious thick gravy. I've never been a fan of bitter gourd, but cooked this way, I love. One big plate of rice this way please.

Pork Ribs with Black Bean and Bitter Gourd

Ingredients

1 large bitter gourd
700g pork ribs, cut into 1/2 inch slices
1 tbsp dark soy (Cheong Chan thick caramel)
1 tbsp vegetable oil
6 cloves minced garlic
1/2 tbsp salted soy beans (brown), mashed
1 1/2 tbsp salted black beans, roughly chopped
1-2 chillies, chopped (optional)
1 1/4 cups water

Seasoning:
1/2 tbsp dark soy (Cheong Chan thick caramel)
2 tsp oyster sauce
1 1/2 tbsp chinese cooking wine
2-3 tsp sugar
3/4 tsp chicken stock powder
1/4 tsp pepper

Method

Slice the bittergourd length-wise into half. Use a spoon to scoop out the spongy white centre and seeds, and discard them. Rinse the bittergourd and sprinkle with some salt to remove some of the bitterness. Leave for 20 minutes, then rinse off the salt. Cut into thick slices (about 3/4 inch).

Rub the pork ribs with 1 tbsp dark soy. Heat vegetable oil in a pot and fry the garlic, soy beans, black beans and chillies. Once fragrant (about 3 minutes), add the pork ribs and fry until all the pieces are seared and coated in the sauce. Add water and seasoning ingredients and bring to a boil. Simmer for 45 minutes until meat is tender, then add the bittergourd and simmer for another 20 minutes. Let the sauce reduce until it turns into a thick gravy. Remove the lid to speed up the process. Mix the pork and bittergourd around in the sauce so that every piece is nicely coated in the yummy sauce. Dish out and serve with steamed white rice.
reade more... Résuméabuiyad

Taiwanese Braised Pork Rice ("Lu Rou Fan")


I was inspired to cook this after trying something similar at Lai Lai Casual Dining, a Taiwanese restaurant in Singapore. It's Taiwanese style braised pork belly with a thick, sweet and salty gravy that is full of  umami flavours. If you're far away from family and feeling homesick, this comforting bowl of braised pork over steamed white rice is just what you need! I usually make a big pot of this and freeze the leftovers for days when I have no time to cook.


Taiwanese Braised Pork Rice ("Lu Rou Fan")

Ingredients

1kg (2 lbs) pork belly, skin-on
1 tbsp vegetable oil
8 cloves garlic, peeled and lightly crushed
1 star anise
2 inch cinnamon stick
1/2 tsp five-spice powder
1/2 cup light soy sauce (I used Lee Kum Kee Superior Light Soy)
1 tsp thick dark soy sauce (I used Cheong Chan Thick Caramel)
1/3 cup chinese cooking wine
3 cups water
1/4 tsp pepper
2/3 cup crispy fried shallots (I used the prepacked store-bought ones)
3 tbsp (about the size of a ping pong ball) rock sugar
6 hard boiled eggs

Method

  1. Blanch the pork belly in a pot of salted boiling water for 5-10 minutes to get rid of the scum. Remove, rinse the pork. Then, slice into 1/2 cm (1/4 inch) pieces.
  2. In a large pan/pot, heat 1 tbsp oil and fry garlic, star anise and cinnamon stick for 5 minutes. Add the pork and dark soy and fry until pork is lightly browned all over.
  3. Add the five-spice, light soy, chinese cooking wine and stir through until it starts to simmer. Add the water, crispy shallots and pepper and bring everything to a boil. Add the rock sugar (use more or less to taste).
  4. Cover the pot with a lid and let it simmer on low-medium heat for 1-2 hours until pork is tender and sauce is slightly thickened. About half an hour before the dish is ready, add in the hard boiled eggs and submerge them in the sauce to simmer. Adjust to taste by adding more water if it's too salty or too thick, Stir the gravy occasionally to make sure it doesn't burn at the bottom of the pot.
  5. When pork is tender and eggs are lightly browned, dish out and serve on top of steamed white rice with some blanched greens or pickled vegetables.


reade more... Résuméabuiyad

Okonomiyaki Pancake-style Gyoza


There are some things in life that just can't wait, like these beautifully charred pork dumplings (or gyozas) topped with okonomiyaki sauce, mayonnaise, spring onions and bonito flakes. I was getting my regular TV fix of Destination Flavour Japan last week, and as I watched Adam Liaw flip over a pan of crisp charred dumplings onto a plate, I couldn't help but imagine how tasty those gyozas would be if I could just have a bite. Gyozas are similar to Chinese potstickers (guotie), though their Chinese counterparts usually have thicker skins and are slightly bigger. Both are usually served with a soy and vinegar dipping sauce, sometimes with chilli oil and shredded ginger too.

By the way, check out these dancing bonito flakes below!


I've never made gyoza wrappers from scratch before, though they are really good because you can roll them out thinly and they get nice and crisp after frying. If you can't spare the time to make them, store-bought wrappers work fine too. In the show, Adam used Otafuku sauce, which is a popular brand of Okonomiyaki (Japanese pancake) sauce. I decided to make my own sauce from scratch based on my Modanyaki recipe post.

 
These pancake-style gyozas are fantastic, especially with the tangy okonomiyaki sauce and the creamy mayonnaise. The best part are the burnt black bottoms of the dumplings, which gives it the extra oomph! Seriously. The addition of the potato starch solution during the last part of cooking gives the gyozas the wafer-thin crispy "wings" on the edges. A word of advice: please use a good non-stick pan, and by that I mean one that still has the non-stick coating over it. The pan I used was really old and worn, and so some of the dumplings got stuck to the surface, which made it tricky to pry them off without tearing the delicate skins. Nevertheless, I manage to salvage most of them to a reasonable extent. Most importantly, they tasted good!

I'm looking forward to making these again. Miss H was only too happy to help with rolling out the dumpling skins. Next time, I might teach her how to pleat them, neatly. And in a few more years, I'll be able to sit back and supervise her in the kitchen! Patience. Do try your hand at making these gyozas. It's fun to serve them okonomiyaki-style (we love Japanese mayo!).  They are equally delicious when simply served with a soy and vinegar dipping sauce.

Click here to continue to the Gyoza Recipe plus more photos! >>
 
Charred - mission complete!
 
 
reade more... Résuméabuiyad

Coffee and Almond Pork Ribs


Deep-fried pork ribs with coffee sauce is a popular dish in Singapore and Malaysia, and is usually served with steamed white rice. During my recent trip to Singapore, I had the chance to try it at Prosperous Kitchen restaurant and it was really good, especially with the almond flakes on top which helped cut through the richness of the sauce. I attempted to replicate it at home and it was a success (applause from Mr G), though my version was more robust with an intense coffee flavour. These sweet and sticky pork ribs are absolutely delicious and addictive, and are best enjoyed with a generous plate of white rice.


Coffee and Almond Pork Ribs

Ingredients

700g (1 1/2 lbs) pork ribs, chopped into segments
1 egg white, lightly beaten
1 1/2 tbsp cornflour
1 tbsp rice flour
Vegetable oil, for deep-frying
1/4 cup almond flakes, toasted

Marinade:
1/2 tsp bicarbonate of soda
1/2 tsp salt
1 tsp sugar
1/4 tsp pepper
1/4 tsp five-spice powder
1/2 tbsp chinese cooking wine

Sauce:
2-3 tsp instant coffee granules (depending on strength of coffee)
1 tbsp Coffee-mate non-dairy creamer
1 tbsp white sugar (or to taste)
1 tbsp brown sugar
2 tbsp oyster sauce
1 tbsp tomato sauce
1 tsp kecap manis (optional)
1/4 tsp sesame oil
1/2 tsp cornstarch
1/3 cup water

Method

Season pork with marinade ingredients for 2 hours.  In the meantime, combine sauce ingredients in a bowl and mix well. Adjust amount of sugar used if desired.

Just before frying the pork, mix it with eggwhite, cornflour and rice flour. Heat oil in a wok/pan and deep-fry pork ribs on medium heat until golden. Remove and set aside. Heat oil again on high heat and fry pork ribs again until golden brown and cooked. Drain on kitchen paper or wire rack.

In a clean wok, add 1 tablespoon vegetable oil on medium heat. Stir the sauce ingredients in the bowl and pour into the wok. Bring to a boil while stirring constantly, until sauce is thickened.

Add pork ribs to the sauce and toss to coat. Transfer to a serving plate and sprinkle with toasted almond flakes. Serve immediately with steamed jasmine rice.


reade more... Résuméabuiyad

Vepro-Knedlo-Zelo (Czech Roast Pork with Dumplings and Sauerkraut)

 
A few weeks ago, we had a team lunch at Tony Roma's, and naturally at some point, we talked about food, allergies, cooking etc. My boss then posed a question on what was the best meal we've ever had. I couldn't think of a particular "best meal" because eating is not just about the food, but the experience and atmosphere as well. So, my response was more around my most memorable meal, many years ago when I first had deep-fried herb-crusted lamb's brains at Ginger Nuts (what a funky name!) at Port Fairy, a charming fishing village at the end of the Great Ocean Road in Victoria, Australia. I will never forget that experience, and boy, did they taste good!


I later recalled another favourite food memory at La Boheme, a restaurant in Balmain that serves European cuisine and where I fell in love with the roast pork and dumplings. I have to admit that the dish wasn't much to look at and I was a little sceptical at first. There were some thin slices of pork covered in a pale-coloured sauce, with pieces of dumplings on the side that looked rather dense and unappetising. Well, looks certainly are deceiving. After taking my first bite, I couldn't wipe the goofy smile off my face. It was comfort food. It was happy food. I savoured each and every mouthful after that and polished off every bit of sauce and crumb on my plate. It went down well with a glass of Czech beer (can't remember what it was).
 
I found some recipes for Czech roast pork with dumplings and finally decided to make it at home. Apparently, it's the national dish of the Czech Republic. It's not that difficult, although it does take time to make the dumplings, and roast the pork. The sauerkraut is easy. You might need some elbow grease in making the dumplings unless you use a stand-mixer to knead the dough. I was really happy at how everything turned out, especially the dumplings which were perfect. Surprisingly, the kids (who are fussy eaters) loved it too! The recipes below have been adapted from various sources. I can't say if they even close to being authentic, but the flavours are wonderful and I loved it.
 
Roast pork, dumplings and sauerkraut with gravy - comfort food for the soul
 
Czech Roast Pork
Adapted from Epicurious
 
Ingredients

1 tablespoons vegetable oil
1/2 tablespoon prepared mustard
1 tablespoon caraway seeds, crushed
3 cloves garlic, minced
1/2 tablespoon salt
1 tsp ground black pepper
1.2 kg (2.5 lbs) pork shoulder / leg  roast
1 large onion, roughly diced
1/2 cup water  (add more if liquids dry out too much)
1/2 tablespoon cornstarch dissolved in 2 tbsp water
1 tablespoon butter
 
Method

Form paste with vegetable oil, mustard, caraway seeds, garlic powder, s/p.
Rub on pork roast and set aside for 30 minutes.
Preheat oven to 180C/350F
Place onions in roasting pan. Add water.
Place roast, fat side down, on top of onions.
Cover pan with foil.
Roast 1 hour in the preheated oven. Remove foil, turn roast, score the fat. Continue roasting, fat side up 2 hours uncovered (add more water if pan is drying out). Remove from heat, reserve pan juices. Let sit about 10 mins before cutting into thin slices.

In a saucepan, bring pan juices to boil. Gradually add 1/2 cup water or more to make a sauce. Mix butter and cornstarch solution to thicken slightly, reduce heat, simmer 5 minutes. Taste and adjust seasoning if necessary (or add more water if it's too salty). Serve with sliced pork, dumplings and sauerkraut. Please find the recipes after the jump.
 
These yeast-based dumplings are simply wonderful! Reminds me of Chinese steamed buns!


Czech Dumplings
 
Ingredients
 
1/2 sachet dry yeast
1/2 tsp sugar
1/4 cup milk, cool
1/2 cup milk, warm
1/2 egg
1/4 tsp salt
2 cups plain flour
2 cups cubed stale white bread
 
Method
 
  1. Mix the first three ingredients, let stand for 10 minutes. Mix the warm milk, egg, salt, yeast mixture and flour. Knead for 10 minutes or until smooth and elastic. Add the bread cubes and knead it into the dough. Place in a large bowl, cover with a cloth and let the dough rest in a warm place to rise. It should double in about 2 hours.
  2. Knead again and divide into 2 sections. Roll each section into a log, each about 1 1/2" thick and 7-8" long. Let rise another 1/2 hour. Drop the logs of dough, one at a time, into a large pot of boiling salted water with a tight fitting lid. Boil gently on medium-low heat for about 10-12 minutes. DO NOT LIFT THE LID!! Remove with slotted spoons and place on a wooden chopping board. Immediately use the sharp point of a knife and poke holes in it to release the steam. Keep warm by draping a cloth over them and to prevent it from drying out. When ready to serve, slice 3/4" thick with a sharp knife.

Delicious sauerkraut!
 
Sauerkraut
Adapted from various sources

Ingredients
 
1 (16 ounce) jar sauerkraut 
1 tbsp vegetable oil
4 slices bacon, diced
1 onion, diced
1 teaspoon caraway seeds
2 tbsp sugar (or to taste)
Salt and pepper to taste
1 teaspoon cornstarch mixed with 1 tbsp water
 
Method
 
Pour the sauerkraut into a large bowl. Use hands to squeeze out the "juice" into the bowl. Reserve the juice.
Roughly chop the sauerkraut at 2 inch intervals.
Heat oil in a medium pan and fry bacon and onion for 2 minutes. Add caraway seeds and sauerkraut and fry for 1 minute. Add some of the reserved sauerkraut juice until it almost covers the top of the sauerkraut. Add sugar, salt and pepper to taste. Stir briefly, and then cover with a lid and simmer for 15 minutes. Turn off heat and keep warm. Serve with pork and dumplings.


I made roast pork loin with crispy crackling instead


reade more... Résuméabuiyad

Sweet and Spicy Pork Ribs


I grew up in a culture where rice is a staple food, and almost every meal (that my mum cooked) would consist of boiled white rice served with a variety of meats, soups and vegetables. Mum's a fantastic cook who takes pride in the food she prepares for us, which is why I always look forward to her cooking whenever I go back to visit. I try to learn as much as I can from her, although in the much earlier years, before my foray into the kitchen, I was merely interested in consuming the end product and not so much how it was prepared.  I have, however, picked up many kitchen tips from her since then, which are truly invaluable and have probably saved me from countless pain and heartaches in the kitchen. Thanks Mum!

With my family, I've followed the same tradition of serving rice for dinner (except for the occasional fast food or fish and chips on the weekends - kids, you know, gotta keep them happy). There are  endless types of dishes that go with rice, ranging from healthy stir-fries and stews to sinfully indulgent deep-fried foods (which is really okay if you don't eat them too often).


In today's post, I'm featuring these crunchy deep-fried pork ribs slathered with a creamy chilli and tomato sauce (this probably falls under the "sinfully indulgent" category). I've made these three times already, simply because they are sooooo addictive and deliriously good. It's a little like sweet and sour pork, but more spicy than sour (uhh... hence I named it sweet and spicy pork ribs). G enjoyed them so much that he claimed he would drive miles just to eat it. But really, this is a simple and easy dish to pull off, and most of the ingredients should already be stocked in the fridge or pantry. I've specifically used Lingham's chilli sauce in the recipe as it has a sweet garlicky flavour that gives the sauce that "special" taste. It should be available in most good supermarkets, otherwise try substituting with Thai sweet chilli sauce instead.

Sweet and spicy pork ribs

Ingredients

450g (1 lb) pork spare ribs (or substitute with belly pork, skin removed)
3 tbsp cornflour, extra
2 cups vegetable oil for deep frying
1/2 tsp vegetable oil
Scallions, chopped, for garnish

Marinade:
1/2 tsp sesame oil
1/2 tsp bicarbonate of soda
1 small egg (or half a large egg)
1 tbsp plain flour
1 tbsp cornflour
1/3 tsp salt
Dash of pepper

Sauce (combine in a bowl):
2 tbsp Lingham's chilli sauce
1 tbsp ketchup
1 tsp Sriracha chilli sauce (or more to taste)
4 tbsp mayonnaise

Method
  1. Slice the pork into 3/4 inch cubes. Spread a few pieces out on the chopping board, cover with clingwrap and pound with a meat mallet to tenderise the meat. Repeat with the rest of the pork.
  2. Combine pork with the marinade and mix well. Set aside for 30 minutes.
  3. Heat vegetable oil in a deep pan or wok on high heat. Toss the 3 tbsp cornflour onto the pork and toss to coat evenly.  When the oil is hot (slowly lower a piece of pork into the oil - if it sizzles, the oil is ready), add the pork piece by piece so that they don't stick together when cooked. Cook in two batches to avoid overcrowding in the pan.
  4. Let the pork fry in the oil for 2-3 minutes before turning over. Fry for another 2 minutes or until lightly golden brown and crisp. Remove and drain on kitchen paper or a metal rack.
  5. Heat a medium sized wok or non-stick pan with 1/2 tsp vegetable oil. When hot, add the sauce ingredients and stir with a spatula until it starts to simmer a little (you just want to heat it up). Add the deep-fried pork and toss in the sauce until evenly coated. Transfer to a serving plate and garnish with chopped scallions. Serve immediately with boiled jasmine rice. Enjoy!
 
reade more... Résuméabuiyad

Grilled Pork Belly with Spicy Sauce


Hello! It's been a while since I last did a proper post on my blog. Life has just been a little busy lately, and just when I thought things were starting to wind down, my calendar for the next two months is fast filling up with dates for parties, school events, concerts and birthdays. And when you have three kids like me, multiply that by three and you'd wish weekends were a little longer, and perhaps with a free day for cooking and baking. Last weekend, I managed to find time to prepare these grilled pork belly skewers which were inspired by my recent dining experience at Sake restaurant in Sydney. What I found interesting was the spicy antichucho sauce that was served with the grilled pork (kushiyaki). Antichucho is apparently Peruvian grilled marinated beef hearts, served with a tangy and spicy sauce, I believe. As there is a considerable Japanese influence on Peruvian cuisine (one of Peru's presidents was of Japanese descent), that explains the use of the antichucho sauce in this dish.

I recalled seeing a recipe for antichucho sauce in the cookbook "Nobu Now" which I have adapted below by substituting the aji panca (a type of Peruvian chilli paste) with - Korean red pepper paste! I mean, they are both chilli peppers right? Just of different descent. The sauce turned out pretty good actually, spicy and tangy with a hint of cumin, a flavour I immediately picked up when I tasted the one at Sake. I drizzled some of the sauce onto the tender and fatty grilled pork belly (see also Crispy Roast Pork Belly), topped it with chopped scallions and squeezed some lemon juice over it which lifted the flavours altogether. Mr G tried it and gave it two thumbs up! Try out this dish for your next barbecue this summer!


Grilled Pork Belly Skewers

Ingredients

1kg (2 lbs) pork belly
Salt
Pepper
Vegetable oil
 
To serve:
Sesame oil mixed with a pinch of salt (for brushing)
Chopped scallions/spring onions
Lemon wedges
Spicy sauce (see recipe below)

Method:

  1. Boil some water in a pot with 2-3 teaspoons salt, and place the pork in the boiling water, making sure it is totally submerged. Boil uncovered for 30 minutes. Remove and drain on a wire rack. Pat dry with a paper towel and leave for about 20 minutes to dry out. Rub about 1/2 tbsp of salt over the meat and skin. Place in the fridge uncovered for 4 hours or overnight.
  2. Score the skin in a criss-cross diamond pattern with a knife, about 1/2 cm apart. Make sure it cuts through to the fat, as this will allow the fat to render. Rub a little salt and vegetable oil over the skin.
  3. Preheat oven to 180C (350F).  Place on a wire rack skin side up, and pour about 1-2 cups of water into the roasting pan so that it steams the meat in the oven. Place the pan in the middle rack in the oven and roast for 1 hour. Increase temperature to 220C (450F) and roast for another 15 minutes or until skin starts to brown and sizzle. Turn on the grill/broiler on high to crisp up the skin, which should begin to bubble and blister! When it starts to char, and the skin is evenly crisped all over, remove from oven and let it rest for about 10-15 minutes (you can scrape off the blackened charred bits first using a knife). 
  4. Slice the pork into 1 inch cubes. Thread them onto wooden skewers and grill them on the barbecue or non-stick pan until lightly browned on both sides. Arrange on a serving dish. Lightly brush the pork with the sesame oil and salt mixture. Then, drizzle with spicy sauce, garnish with chopped scallions and add a splash of lemon juice.
  5.  
Spicy Sauce Recipe

3 cloves garlic, finely minced
2 1/2 tbsp gochujang (Korean red pepper paste)
1 1/2 tbsp sake
2 tbsp apple cider vinegar (or white rice vinegar)
2 tbsp olive oil
1/2 tsp tomato sauce
1/2 tsp sugar
1/4 tsp ground cumin
1/8 tsp dried oregano

Method:

Combine the ingredients above and place in a small pan on medium heat. Fry briefly, then transfer to a small serving dish.


reade more... Résuméabuiyad

Farfalle Pasta with Sausage and Mushrooms in a Rosa Sauce


The moment I did a preview of the photos on this post, I knew I had forgotten to add something to the pasta. Peas! That's what was missing! It would have added such a nice pop of vibrant green to the dish. Well, at least I didn't forget the parsley, for both flavour and colour. It's been a while since I last cooked pasta, and when I do, it's usually a spaghettini with bacon and mushrooms in a creamy lemon butter sauce. I can't help it. Those are all my favourite ingredients and it's the only way I know how to incorporate them all in one delicious  meal. Well, up until two days ago when I made this super delicious pasta (I used bowtie or farfalle) with pork and fennel sausages, mushrooms, pancetta in a creamy tomato sauce. It was an absolute hit with everyone in the family (even my picky toddler, who often scoffs at any food I place in front of him, was too happy to finish his bowl of "butterflies" -that's what I told him they were).


I've used farfalle here, but you can easily substitute with penne or any other pasta you like. It's a really easy dish to make, and one that you can quickly get to the dining table on a busy weeknight. I used Italian sausages which I bought from Woolworths, and these were basically labelled as gourmet pork sausages with fennel and Italian herbs. They worked really well in this dish and tasted really good too. As for the rosa sauce, it was a combination of tomato passata (or tomato puree), butter, thyme, lemon juice and cream. A rosa sauce is essentially a combination of a tomato sauce with a touch of cream. The cream helps to mellow out some of the acidity from the tomatoes to yield a sweet and velvety pink sauce that is just perfectly balanced.  I added mushrooms to the dish, but I forgot the peas. Both are optional, but if you like peas and mushrooms (or even zucchini, capsicum or any other vegetables you may have lying around), then throw them in. We just love, love this pasta and that delicious creamy sauce!


Farfalle with Sausage, Pancetta and Mushrooms in a Rosa Sauce

Ingredients

350g dried farfalle / bowtie pasta
2 tbsp olive oil
3 cloves garlic, chopped
1 onion, finely diced
100g (3.5oz) pancetta, chopped
300g Italian style pork sausages, casings removed
250g (9oz) button mushrooms, sliced
1 tbsp chopped thyme leaves
700g (25oz) tomato passata (or tomato puree)
1/4 cup green peas
2 tbsp butter
2 tbsp lemon juice
1/2 cup thickened / heavy cream
Salt and pepper to taste
Grated parmesan
Extra-virgin olive oil, to serve
3 tbsp flat-leaf  parsley leaves, chopped

Method

  1. Cook pasta in a large pot of boiling, salted water, following packet directions, until al dente.
  2. Heat the olive oil in a large pan on medium-high heat and fry the garlic, followed by the onions and pancetta. Fry for 5 minutes until onions are softened.
  3. Add the sausage meat and use a spatula to break it up in the pan. Fry for 3 minutes, then add mushrooms and fry for another minute.
  4. Add thyme and passata, and bring to a boil. Add peas and gently simmer the sauce for about 10 minutes. Season with salt and pepper. Stir in butter. lemon juice and cream and simmer again for 5 minutes until sauce is slightly thickened. Turn off the heat.
  5. Drain the cooked pasta and add to the sauce in the pan. Mix well to combine. Transfer to individual serving plates, sprinkle with grated parmesan and chopped parsley, and drizzle with extra-virgin olive oil. Serve immediately. Enjoy!


reade more... Résuméabuiyad