Pages

.

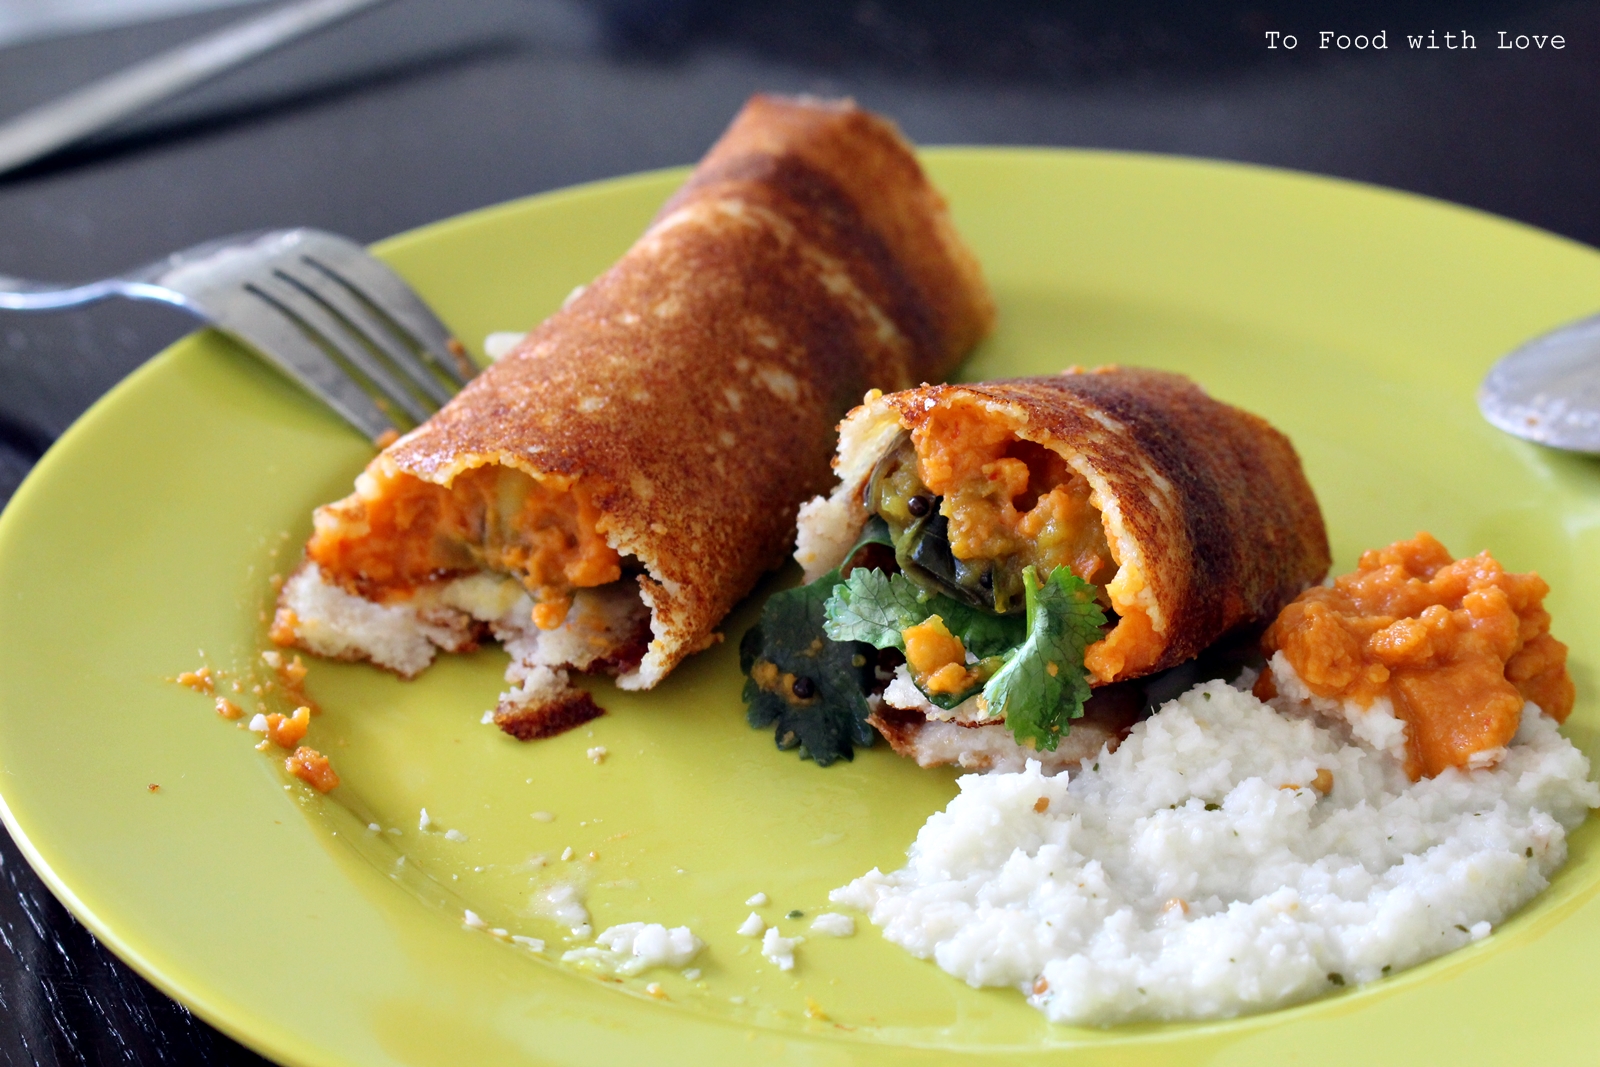
Masala Dosa (Far Flung wtih Gary Mehigan)


I have a weakness for all things caramelized, golden brown and crispy. Take for example, this Okonomiyaki Pancake-style Gyoza which was featured in Adam Liaw's Destination Flavour Japan two years ago. How could anyone resist those crispy charred-bottom dumplings doused in Kewpie mayonnaise? Well, certainly not I! Nor could I resist the temptation of the golden crispy dosa that Gary made in his latest cooking show "Far Flung with Gary Mehigan" which started airing on Channel Ten two weeks ago.
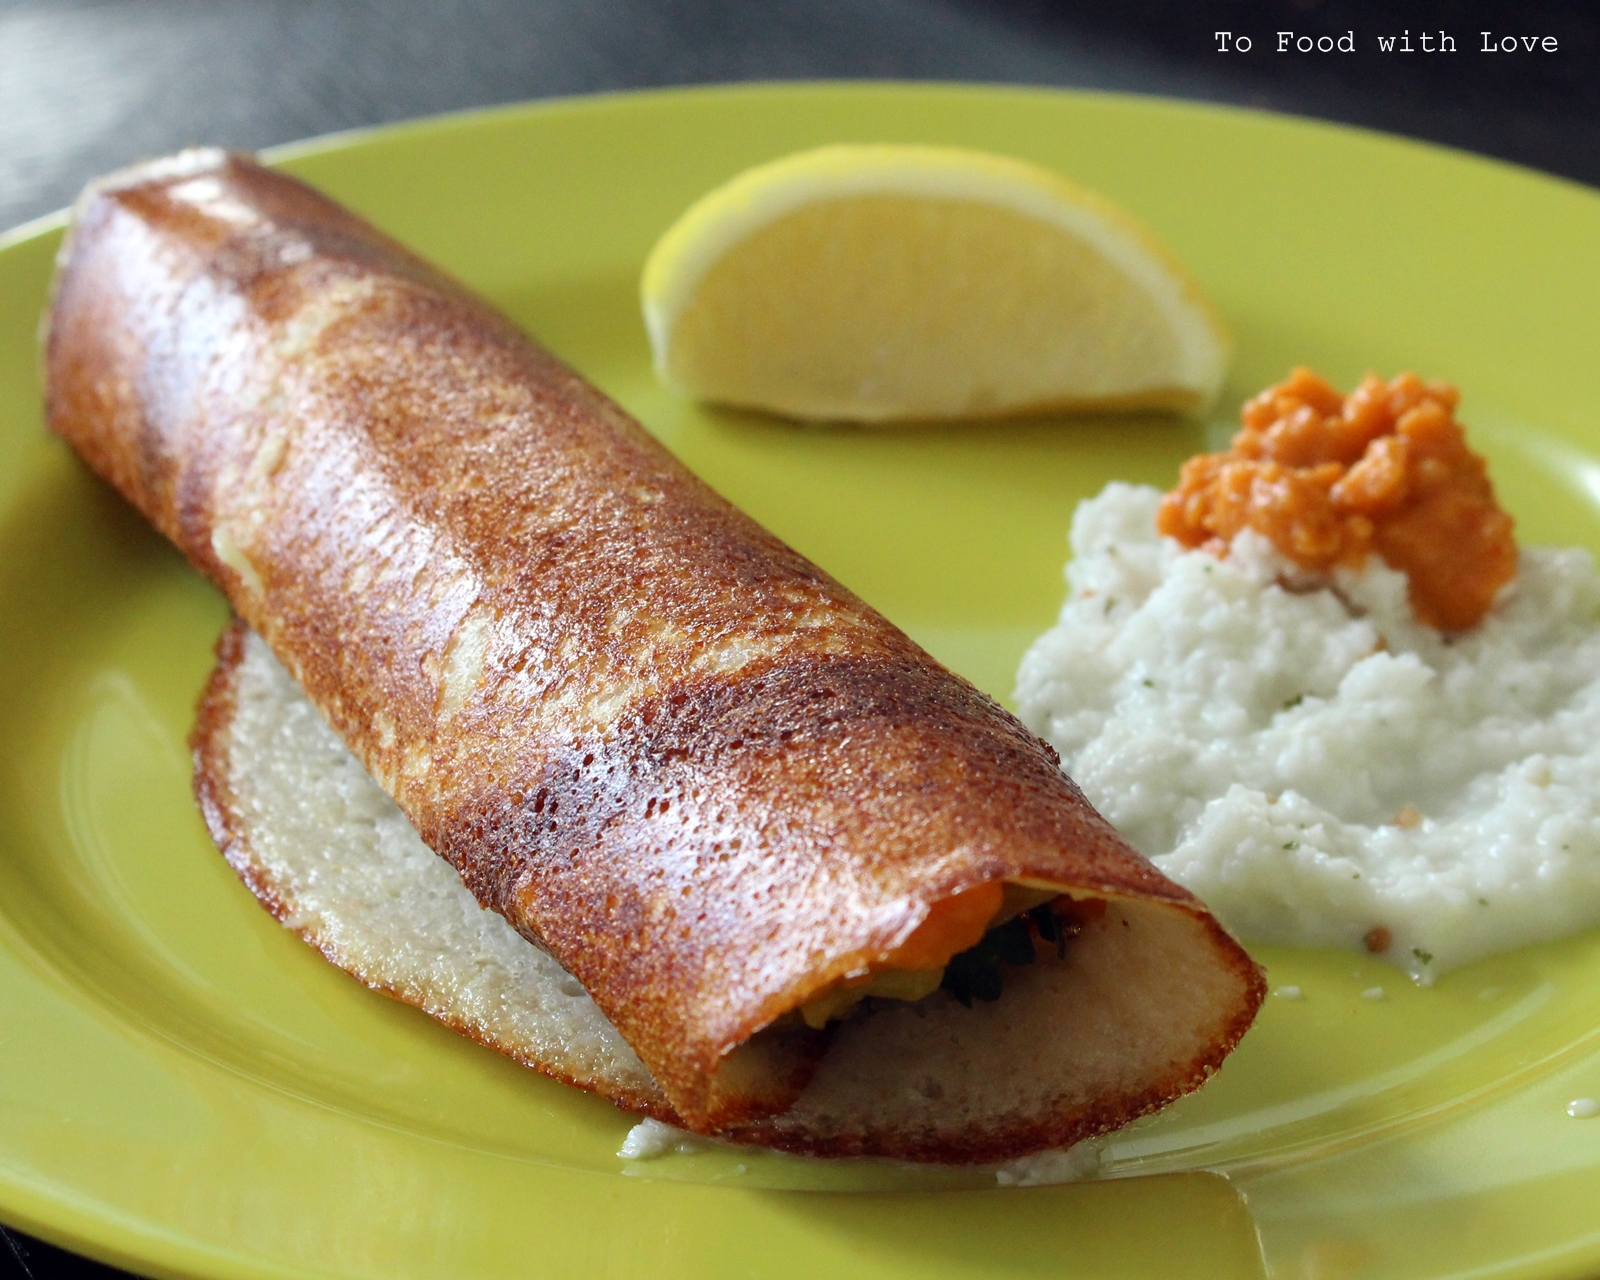

Dosa is one of my absolute favourite Indian foods, especially crispy paper dosa, which is a very thin and crispy dosa served with sambar and chutney. My trips back to Singapore are never complete without having paper dosa at least once at Little India.


And so begins my inaugural attempt at making masala dosa. The most important part of all this is the fermentation of the batter, which mainly made from rice and urad dal. Without adequate fermentation, you won't get the distinctive sourish taste of dosa. It's winter in Sydney and not the best time to find a warm spot to let the batter do its job. I did chuck it in a warm oven (turned off) for a little while, though it wasn't very effective. Nevertheless, the dosa turned out marvellouslly well (sans the sourness) and the texture was perfect - crispy on the outside and slightly chewy in the middle. I made the red chutney as well a coconut chutney to go along with it. It was deeeee-licious! If only I had a large hot plate, I could make a few dosas at a time as it takes about 5 minutes for each dosa to turn golden and crispy. I'm salivating at the thought of it now.

The potato bhaji is easy to prepare. I skipped the asafoetida as the bottle I had (from making Pav Bhaji 3 years ago!)  had expired and I didn't bother to buy another. I wasn't too sure if I got the red chutney right as it seemed a little dry (perhaps I used too much chana dal which I roasted/deep-fried until crisp) and so I had to add a fair bit of water to loosen the texture to a spreadable paste. In any case, it was the perfect accompaniment to the masala dosa. I made a quick coconut chutney using dessicated coconut, garlic, curry leaves and mustard seed. I'm salivating again. I think this calls for a dosa party at my house soon. Who's interested? :)


Dosa

1 cup raw short grain rice
1 cup cooked short grain rice
1 cup ural dal
1/4 cup channa dahl
1 tsp fenugreek seeds
Pinch salt
60ml oil or ghee for cooking

Place both the cooked and raw rice and dahls into a medium sized bowl and rinse a few times under running water. Add the fenugreek seeds and cover with water (about 2 inches high).

Cover with cling wrap or a cloth and leave to ferment at room temperature for 5 hours or overnight.

Drain most of the liquid but reserve to one side. Blend the rice and dahl into a batter, adding a little of the soaking liquid if required to loosen. The batter should be the consistency of double cream.

Cover and leave in a warm place to ferment for a further 8 hours or overnight until bubbly and light. Add salt and mix again. Set aside. Prepare the potato bhaji (see below).


Potato Bhaji

2 tbsp vegetable oil
1 tbsp mustard oil (optional)
1/2 tsp brown mustard seeds
1 tbsp chana dal
1/4 tsp asafoetida (optional)
1 large red onion finely sliced
2 green chillies, chopped
10 curry leaves
1/2 tsp salt
3 medium potatoes diced and boiled
1 tsp ground turmeric
1 tsp salt (or to taste)
1/2 cup of water
2 tblsp chopped coriander
1/2 lime wedge

Heat the oils in a medium sized pan and add the mustard seeds. They will begin to sizzle and pop, add the chana dal and toast until golden. Add the asafoetida, the sliced onions, green chilies, curry leaves and pinch of salt and cook until light golden.

Add the cooked diced potatoes, turmeric, a pinch of salt and 1/2 cup of water. Stir to combine, lower the heat and cook for a further 3-4 minutes to allow the heat to draw through the potatoes and for the flavours to combine. Set aside.


To make and assemble the dosa: Heat the dosa pan over a low heat (if it's too hot, the batter will set too quickly making it difficult to spread it around the pan) and pour a ladle of batter into the centre of the pan. Starting from the middle spread the batter out in concentric circles towards the outside to form a thin pancake. Don't try to retrace the lines.

Drizzle a little oil around and over the dosa and cook gently for 3-4 minutes until the bottom is golden and crisp. Spread some red chutney (see recipe below) over the dosa and place a spoonful or two of the potato bhaji into the centre, and carefully roll into a large tube. You need to do this while the dosa is still hot, otherwise it will be difficult to roll once it cools down. You can also fold it into a half-moon shape.

Serve the dosa warm with a little bowl of coconut chutney, fresh lime wedges and fresh chopped coriander. 

Red Chutney

1/2 cup roasted channa dahl
1 tbsp crush ajwain seeds
8 cloves garlic
5-6 long red chillies (I used dried chillies that have been blended and fried in oil)
1 tbsp lemon juice
1/2 tsp salt
Water

Combine in a spice grinder along with a little water and blend to a paste. 


Here's a variation of dosa with a lightly beaten egg spread over the top and cooked till set.
Something a bit more substantial!


reade more... Résuméabuiyad

Light and fluffy Ricotta Cheesecake (with homemade ricotta)


I made ricotta cheese. Did you not know you could do that, with only 3 ingredients in less than 10 minutes! And all with curds and whey, I felt like Little Miss Muffet now waiting for a spider to pounce at me. So why make ricotta? Apparently, homemade ricotta gives the cheesecake a fluffier texture, and it did turn out to be light, fluffy and creamy, with a subtle taste of ricotta. I used a gingernut biscuit base just to add some flavour and texture, although you can omit that to make a crustless version.


This is not a very sweet cake, unlike your typical New York cheesecake. It's probably closer to a Japanese cheesecake except for the fine graininess of the ricotta. If you like, you can serve it with some berry coulis to satisfy that sweet tooth. I find that the cake tastes best after it has "matured" for up to 3 days in the fridge. The flavours seem to have developed and the texture is somehow creamier too.

Ricotta in the making

Homemade Ricotta
Adapted from Smitten Kitchen
Makes 1 generous cup of ricotta

Ingredients

3 cups whole milk
1 cup heavy cream
1/2 tsp salt
3 tbsp lemon juice (or substitute with white vinegar)

Method

Pour the milk, cream and salt into a medium-sized nonreactive saucepan. Heat the milk to 190°F (or until it's just about to come to a simmer), stirring it occasionally to keep it from scorching on the bottom. Turn off the heat. Add the lemon juice or vinegar, then stir it once or twice, gently and slowly. Let the pot sit undisturbed for 5 minutes.

Line a colander / strainer with a layer of muslin or cheesecloth and place it over a large bowl (to catch the whey). Pour the curds and whey into the colander and let the curds strain for at least an hour. At an hour, you’ll have a tender, spreadable ricotta. At two hours, it will be spreadable but a bit firmer, almost like cream cheese. (It will firm as it cools, so do not judge its final texture by what you have in your cheesecloth.) Discard the whey. Eat the ricotta right away or transfer it to an airtight container and refrigerate until ready to use. (For purposes of making the cheesecake, I left the ricotta in the muslin cloth and placed it in an airtight container in the fridge overnight to drain the ricotta further).

Ricotta Cheesecake
Adapted from The Baked Road

Ingredients

Crust:
120g Arnotts Ginger Nut biscuits *
60g melted butter

Filling:
1 packet cream cheese (250 g / 8 oz), room temperature
250g (8 oz or 1 cup) ricotta cheese, room temperature
4 eggs, separated and at room temperature
3/4 cup sugar
1/4 cup sour cream or plain yogurt
1 tsp vanilla extract
2 tablespoons lemon juice
1 1/2 tablespoons cornstarch
1/2 teaspoon vinegar

* Note: You can substitute with 150g Arnotts Orange Slice (cream biscuits) and 15g melted butter. Or if you prefer chocolate, use 150g Oreo cookies and 15g melted butter.

  1. Preheat oven to 180C / 350 F. Grease and line the base of an 8 inch (3 inches tall) round springform pan. Wrap the pan all around with aluminium foil to prevent water from leaking in from the water bath. Boil some water for the water bath.
  2. In a food processor, crush biscuits to fine crumbs. Add butter and pulse to combine. Spread crumb mixture evenly over pan base, pressing firmly with a fork or base of a glass. 
  3. In a mixer using the paddle attachment, cream together the ricotta and cream cheese until smooth. Add in the egg yolks, one at a time. After mixing thoroughly, add the sour cream/yogurt, vanilla, 1/2 cup sugar and lemon juice. Sift in the cornstarch. Mix well.
  4. In another clean bowl, beat the egg whites and vinegar until large bubbles form. Slowly add in rest of the 1/4 cup sugar, and continue beating until soft peaks form.
  5. Fold in 1/3 of the meringue with the cheese mixture until fully incorporated. Add in the rest of the egg whites, folding gently without deflating the meringue but thoroughly. Pour the batter over the biscuit base. 
  6. Place a larger baking pan (one that the 8-inch pan can fit into comfortably) into the oven first (use the middle rack) and pour the boiling water (from step 1) into the larger baking pan until it comes halfway up the cakepan. The waterbath helps minimize the cracks on the surface of the cheesecake and prevents the cake from overcooking.
  7. Bake for 1 hour to 1 hour and 15 minutes. If the cheesecake is browning too fast, turn the heat down to 160C / 300 F, or place a piece of baking paper over the top of the cake to prevent further browning. The cake is cooked when there is still a slight wobble in the middle. Remove the cake from the waterbath and place the cakepan back in the oven to cool, with the oven door slightly ajar. I find that leaving the waterbath in the oven may result in condensation and moisture seeping into the cake.
  8. Refrigerate for a few hours or overnight. Cake tastes best after 1-2 days when the flavours have developed. Dust cake with icing sugar and cinnamon before serving. 


reade more... Résuméabuiyad

Ebi Fry Curry Don (Fried Shrimp with Curry on Rice)


I posted a recipe for Ebi Fry back in February last year (has it been that long??) and I mentioned something about serving the shrimp (or prawn, depending on which country you're from) with thick Japanese curry. Well, it sort of slipped my mind because I was busy trying out other recipes at the time. One year and a bit later, here's the post, and it's still one of my favourite comfort foods, especially now that we're in the middle of winter (Down Under). Crispy and golden panko-crumbed prawns, coated in a thick curry sauce and served with rice, how can anyone resist?


Ebi Fry Curry Don
Serves 4

You will need:
12 large Ebi Fry (fried shrimp) - click here for recipe
4 serves of cooked short-grained rice
4 serves of Japanese curry (see below for recipe)

Japanese curry recipe

I used S&B Golden Curry mix and added chicken, carrots and potatoes. I also added a little honey for a hint of sweetness.

Ingredients

2 tbsp vegetable oil or butter
2 medium onions, finely chopped
700g chicken thigh fillets, cubed
1/2 grated apple (optional)
3 cups water
2 medium potatoes, cut into 1.5 inch cubes
1 large carrot, cut into chunks
120g S&B Golden Curry mix (4 cubes of curry roux)
1 tbsp honey

Method

Heat up oil/butter in a medium pot and fry the onions until soft. Add the chicken and fry for 3 minutes. Add apple if used. Pour in the water and bring to a boil. Simmer for 40 minutes until cooked. Add carrots and potatoes and cook for a further 10-15 minutes until potatoes are just tender. Stir in the curry mix until dissolved, and bring the gravy to a simmer for 5 minutes until thickened. Stir in the honey. Turn off heat and keep warm until ready to serve.

Assembly:

Dish out rice onto 4 serving plates. Place 3 pieces of Ebi Fry on each plate and ladle some of the hot curry over the rice. Enjoy immediately!


reade more... Résuméabuiyad

Yurinchi (Deep fried chicken with sweet and sour sauce)


When I was little, I used to follow my mum to the Malaysian "wet" market in the mornings, where fresh meat and produce were sold. I have vague memories of those adventures, particularly how "smelly" the place was and I had to hold my breath every time we walked past the chicken section. There must have been hundreds of hens cooped up in their tiny plastic cages, clucking away noisily, awaiting their fate. I would cup my hand over my mouth to "filter" the air so that I didn't inhale any bits of chicken feathers floating around. I was relieved once mum finished her marketing and we could move on to the real purpose of the trip - which was to buy breakfast! There were street vendors outside the market who sold "yu tiao" (deep-fried dough fritters) and "muah chee" (glutinous rice balls with crushed peanuts and sugar) and getting to eat them always made the trip so worth it!

I haven't been to a wet market since I came to Sydney. Here, you can buy nicely prepacked meats in all shapes, sizes, grades and cut, which is convenient for those who have no time (or skill) to trim and debone meat. However, one thing I don't understand is why deboned meats don't come with the skin attached. I love using chicken thighs, though I had to debone them myself as I needed them with skin on for this Yurinchi dish. Yurinchi is a Japanese version of Chinese "oil-drenched chicken" and this recipe was based on Adam's Big Pot cookbook, by Adam Liaw. It is a simple dish of fried chicken fillets with a sweet and sour scallion dressing. As the chicken is coated in flour and deep-fried, the skin turns golden, crunchy and chewy at the same time.
             

The sweet and sour dressing for the chicken is superb. When you eat the chicken together with the lettuce, it all tastes so fresh and absolutely delicious, it's hard to believe all that talk about fried chicken being unhealthy. But then again, if you prefer a healthier alternative, try using poached chicken breast instead.

Yurinchi
Adapted from Adam's Big Pot by Adam Liaw

Ingredients

4 chicken thigh fillets, skin on (about 800g)
1/2 tsp salt
1/2 cup potato/corn flour
Oil for deep frying
2 cups shredded iceberg lettuce

Sauce:
3 tbsp rice vinegar
2 tbsp caster sugar
2 tbsp soy sauce
1 tsp sesame oil
2-3 large spring onions, finely chopped
1 tbsp toasted sesame seeds
1 clove garlic, finely minced
1/2 tsp grated ginger

Method

Rub the salt over the chicken. Toss chicken in the flour to coat, shake off any excess.

Heat oil to 180C (medium to high heat) and deep fry the chicken in batches until golden brown and cooked (about 3-4 minutes each side). Drain on a wire rack.

To prepare the sauce, mix all ingredients together until the sugar dissolves.

Arrange the lettuce on a large serving plate. Slice the chicken into 2cm slices and place on the lettuce. Drizzle all over with the sauce. Serve immediately with steamed rice or enjoy on its own!


reade more... Résuméabuiyad

Simmered Pork Belly with Daikon


Most women [generally] get excited when they walk past a shoe shop or designer clothing store, especially when the word "Sale" is flashing everywhere. I don't think I fall in the "most women" category. I do believe in retail therapy as a form of stress relief or pick-me-up when things are looking down, but not when that designer jacket staring at you through the window has more zeroes than you'll ever see on your weekly paycheck. The only time my eyes light up with excitement while shopping is when I walk past the butcher (no, of course I'm not excited AT the butcher!), and then I'd stop to admire the different cuts of meats on display. That's my idea of window shopping. I enjoy browsing through the supermarket aisles or checking out the seasonal produce at the fruit and vegetable market.

I particularly find Korean (and Asian) supermarkets fascinating and I make it a point to go every weekend. From kimchee to frozen dumplings, quirky snacks to an array of teas and seaweed, there's always the temptation to fill the trolley with something new. Daikon (white radish) is commonly used in Korean cooking, and there's always a mountain of big, fat and beautiful radishes on display at the entrance of the supermarket. At three dollars a piece, I couldn't help but buy one. I was thinking of using it to make either steamed radish cake or a pork belly stew (Japanese style). I decided on the latter as the kids love this dish (and once, they even thought the radish tasted like potato), and it's easy to prepare with few ingredients. Winter is all about keeping warm and cozy with comfort food, just like this one.

Simmered Pork Belly with Daikon

Ingredients

3-4 cups water
900g (2 lb) pork belly, cut into 1.5 inch cubes
1/2 inch ginger, sliced
4 cloves garlic, peeled and lightly crushed
3 scallions (white part only)
1 tsp salt or to taste
700g (1 1/2 lb) daikon (white radish), cut into 1.5 inch cubes
5 hard-boiled eggs

Seasoning:
1/2 cup sake
4 tbsp soy sauce
2 tbsp sugar
4 tbsp mirin

Method

  1. Bring water to the boil in a medium pot. Add the pork, ginger, garlic and scallions and boil for 10 minutes. Skim off the scum that floats to the top. Lower the heat and simmer (covered) for 2 hours until tender.
  2. Remove the lid and add the sake. Bring to a boil and let the alcohol evaporate (about 5 minutes). Then stir in the soy, sugar and mirin. Place the daikon pieces over the pork and spoon some of the sauce over the daikon, turning the daikon over occasionally so that it's evenly coated with the sauce. Cover with the lid and simmer for 20 minutes. Remove the lid and bring to a boil and let the sauce reduce slightly (about 30 minutes) until it looks glossy. Taste and adjust seasoning if necessary. Skim off any excess fat or scum floating on top.
  3. Turn off the heat and add the eggs. Let eggs soak in the sauce for half hour to absorb the flavours. Reheat gently before serving with steamed white rice.


reade more... Résuméabuiyad

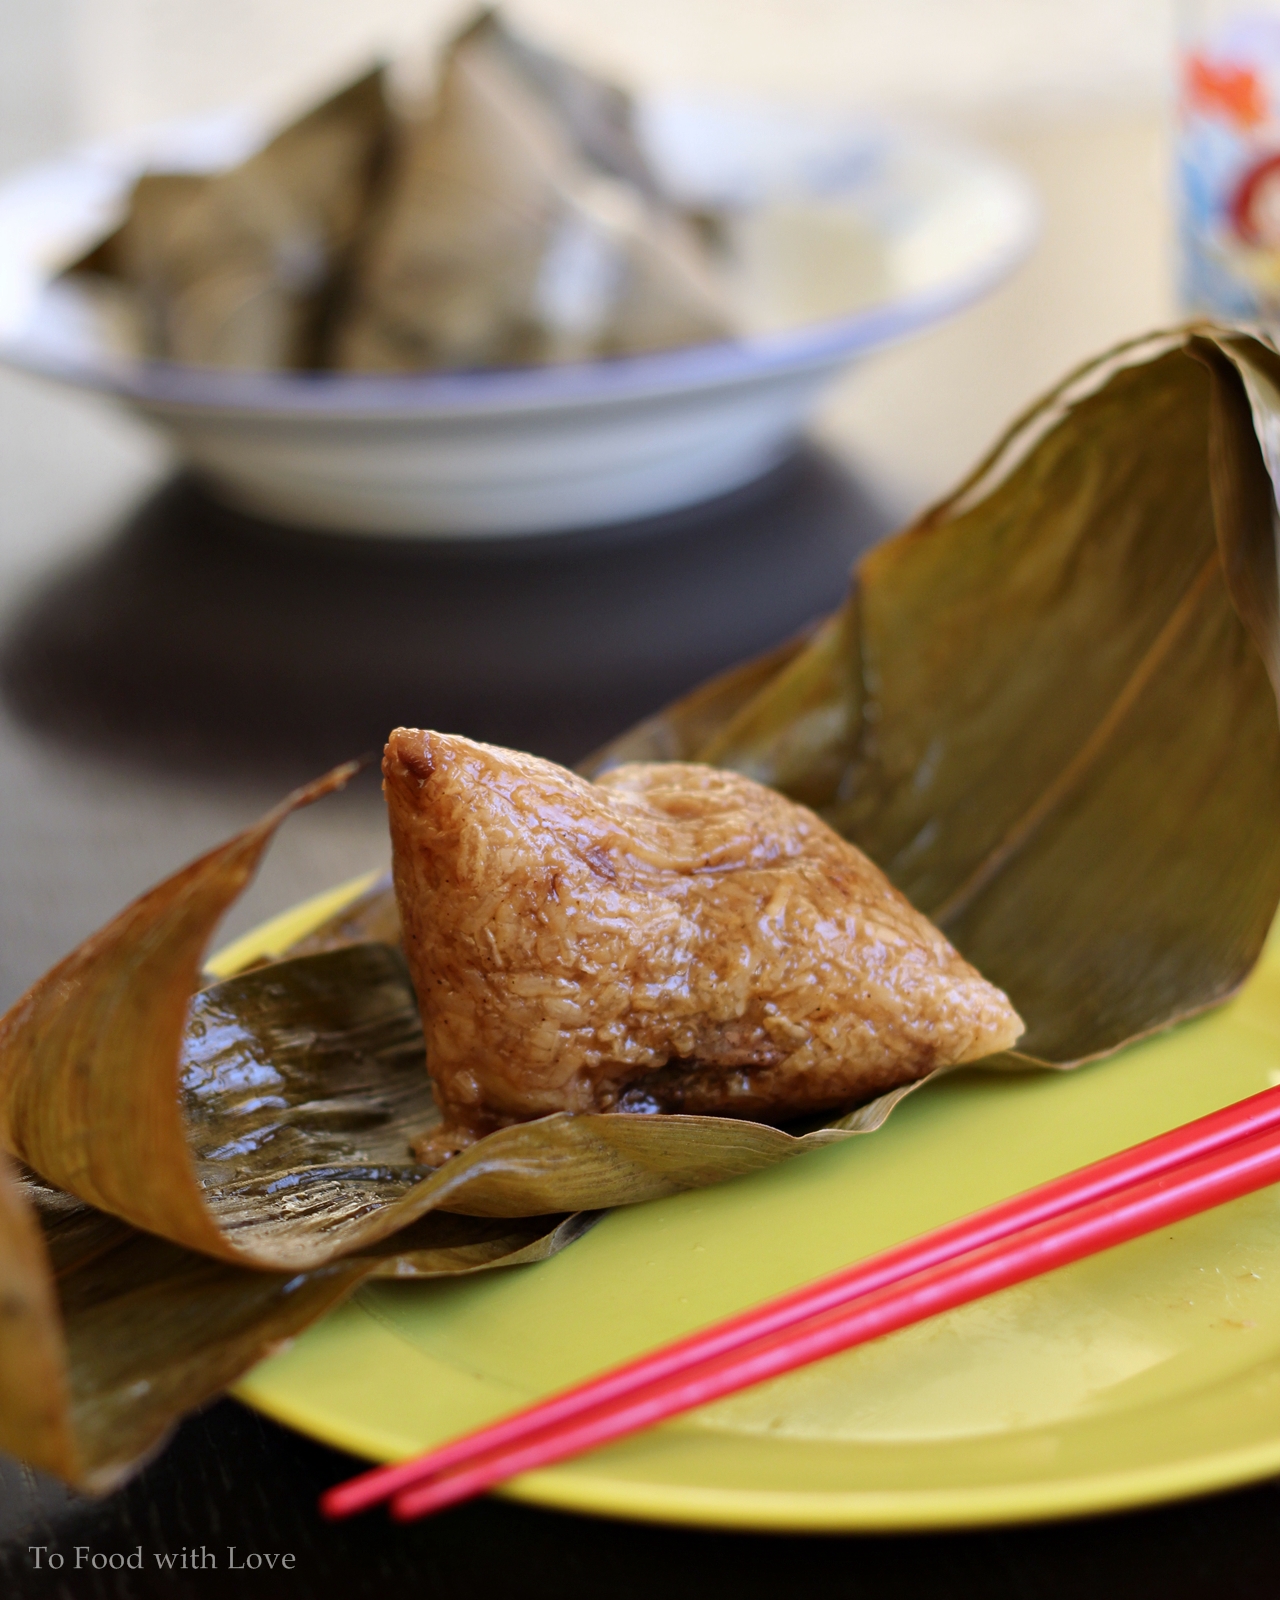
"Bak Chang" (Glutinous Rice Dumpling with Meat)


When I think of the word "multicultural", the first thing that comes to my mind is food (actually I think of food most of the time anyway, which is why I decided to have a blog to pen down all my foodie-related thoughts). In Malaysia, we are fortunate to be able to celebrate a myriad of religious and cultural festivities, and of course with every celebration, there is always food. There are two things I look forward to each year (and which I try not to miss!) which are the Mooncake festival and Dumpling festival ("Duan Wu Jie") or also known as Dragon Boat Festival. The latter was just over on 20 June, and better late then never, I decided to have a go at making these glutinous rice dumplings. Nobody makes better dumplings than my aunt (hers is simply the best!) and I haven't had them since I moved to Australia years ago. 


You can find dumplings being sold at most Asian supermarkets in Sydney, although most of them just don't make the cut. The perfect dumpling needs to have the right balance of flavour and spices and the texture of the rice is so important - not too dry, dense nor sticky. The filling (which is usually pork, dried shrimp, chestnut and mushrooms) needs to be adequately seasoned so that it complements the delicate taste of the rice. 


When I told mum that I was going to make dumplings, she thought I was nuts! Okay, not really, but she thought why bother making them as it is quite a laborious task preparing the ingredients, wrapping the dumplings and boiling them for hours. I was a little skeptical at first, and made sure I planned out my tasks properly and went over the steps in my head. I even watched Youtube tutorials on dumpling wrapping multiple times. It looked easier on video than when it came to wrapping them, but after a few, I got the hang of it. Once I mastered the art of wrapping the rice in bamboo leaves and securing them with string, the entire process wasn't as difficult as I thought, It took about two hours to prepare the ingredients and wrap the dumplings.

The hardest part was actually peeling the chestnuts! I bought fresh chestnuts with shell and all, and took advice from friends and youtube on how to crack them open and peel away the inner skin. I think I might need more practice in that area, or better still, I should just buy dried shelled chestnuts next time! Right now, what I need is a back massage, and some dumplings for supper!

Bak Chang
Makes 20-24

Ingredients:

1 kg glutinous rice
50 dried bamboo leaves
Dried china grass or raffia string for tying the chang

500g pork belly, cut into 1 inch cubes

Pork marinade:
1 tbsp soy sauce
1 tbsp oyster sauce
1 tbsp five spice powder
1 tbsp chinese cooking wine
1 tbsp sesame oil
1 tbsp dark soy sauce (Cheong Chan thick caramel)
2 tsp sugar
1 1/2 tsp salt
1/2 tsp pepper

Chestnuts (12 large or 24 small ones), peeled and boiled until soft
12 large dried Chinese mushrooms, soaked in water for 30 minutes, squeezed dry and halved
1 tsp sugar
1/2 cup oil
1/2 cup dried shrimp, soaked and drained
250g shallots, finely diced
5 cloves garlic, chopped

Rice seasoning:
4 clove garlic, chopped
3 tbsp soy sauce
1-2 tbsp oyster sauce
1 tbsp dark soy sauce (Cheong Chan thick caramel)
1 tbsp sesame oil
1 tbsp five spice powder
2 tsp salt
1/2 tsp pepper

Method

Wash and soak the rice overnight (about 12 hours). Drain rice the next day.
Wash and soak the bamboo leaves overnight. Drain before use.

Season pork with the marinade overnight.

Season the mushrooms with 1 tsp sugar. 

Heat 1/2 cup oil and fry the mushrooms for 1 minute. Drain and set aside. Fry the dried shrimp for 2 minutes, then drain and set aside. With the remaining oil in the pan, fry the shallots, stirring frequently until it starts to turn lightly golden. Add more oil if there isn't enough to fry the shallots. Dish out the shallots together with the oil into a bowl. 

Heat 1 tbsp oil in the wok and fry the  5 cloves of the chopped garlic. Add the seasoned pork and one-third of the shallot/oil mixture above and stir fry for 3-5 minutes until fragrant. Transfer the pork into a bowl. There will be some extra sauce in the wok. Transfer this sauce to the drained rice which we will fry later.

Heat 2 tbsp oil in the wok and fry the 4 cloves of chopped garlic until golden. Add the rice, the reserved shallot/oil mixture and the rest of the seasoning ingredients. Mix until evenly combined. Fry for 6-8 minutes until fragrant. Dish out.

Wrapping the chang:

Take two bamboo leaves (discard those with holes) with the shiny side up with the tip of the leaves facing inwards. Snip off the hard stems at the base of the leaves so that it's easier to fold it later. Shape it into a cone and place 1-2 tbsp of rice into the cone. Add a piece of mushroom, chestnut, pork and 1 tsp of dried shrimp. Fill with more rice until it reaches the top of the cone Make sure it's nice and compact before wrapping it into a triangular prism shape. Tie with string.

Bring a large pot of water to the boil, and add 1-2 tbsp salt if desired. Place the chang into the pot and ensure it's fully submerged. Boil for 2.5 hours, topping up with boiling water if the level goes down. When cooked, remove and hang the chang to dry for about 20 minutes. Enjoy on its own or serve with chilli sauce.

Note: Leftover dumplings can be kept frozen. Thaw the dumplings in the fridge and reheat in a steamer.


reade more... Résuméabuiyad

Korean Fried Chicken with garlic wasabi soy glaze


If there's one thing I can't resist, it's crispy Korean Fried Chicken (see my earlier posts here and here). So far, this is one of my favourites, with a lightly battered yet slightly chewy and crispy skin. The sweet, salty and sticky garlic soy glaze has a hint of wasabi to give it some kick. Chew on that crispy skin smothered with the soy glaze and sprinkling of toasted sesame seeds and you're in heaven. I almost forgot, every bite should be enjoyed with some of those thin ribbons of scallions. It helps to lighten up the dish, adds some freshness and makes the chicken taste more healthy than oily. Like, really. It's not just a garnish, it's a main ingredient. Don't skip it.


Here's a closer look at the crispy chicken wings!
The batter for the chicken was based on a recipe from Saveur. The soy glaze is my own concoction based on the famous "Red Pepper Korean Fried Chicken" at Strathfield Sports Club. Koreans enjoy their fried chicken with a glass of cold beer. I think I might try that next time.

Korean Fried Chicken with Soy Glaze
Recipe for batter adapted from Saveur

Ingredients

800g (about 1 lb) chicken wings
1 1/2 teaspoon salt
Canola/Vegetable oil for frying

Batter:
2/3 cup plain flour
1 tablespoon cornstarch
2/3 cup water

Soy glaze:
2 tablespoon soy sauce
2 tablespoon mirin
2 tablespoon water
1 clove garlic, crushed
1 teaspoon brown sugar (or to taste)
1/4 cup corn syrup
1/2 teaspoon sesame oil
1 teaspoon wasabi paste (or to taste)

Garnish:
Toasted sesame seeds
Scallions, julienned into thin long ribbons

Method

Prepare soy glaze first. Mix the soy, mirin, water and garlic in a saucepan and bring to a boil. Simmer for 1-2 minutes, and add brown sugar and corn syrup and simmer again briefly until it starts to reduce slightly. Stir in sesame oil and wasabi paste. Turn off heat and set aside.

Rinse the chicken wings and pat dry with paper towels. Rub all over with salt and lay out in a single layer to draw the moisture out, about 10 minutes. Brush off excess salt and pat the chicken dry again with paper towels.

Mix the batter ingredients with a whisk until you get a smooth paste. Add chicken and coat in the batter. Heat sufficient oil in a wok for deep-frying (about 2 inches deep) at medium-high heat (180C/350F). Shake off excess batter from each chicken wing before frying it in the hot oil. Fry in batches for 6-8 minutes until golden. Drain on a wire rack or paper towels. Repeat with the rest of the wings. Once all the wings have been fried once, bring the oil back to temperature again, on high heat. Fry the chicken a second time for 3-4 minutes until golden brown and crispy. Drain again. Arrange on a serving plate and drizzle with the soy glaze. Sprinkle with sesame seeds and top with scallions. Enjoy immediately!

Note: If the soy glaze has thickened upon cooling, just heat up slightly in the microwave before serving.


reade more... Résuméabuiyad